 Don't lose your files. Here's how to regularly back up or restore your Mac using Apple's handy, built-in Time Machine tool. t’s a good idea to periodically back up your computer. You want to make sure your documents, photos, and files are protected in case of hardware failure, software glitch, or malware attack. Apple makes this process easy for Mac users with the built-in Time Machine tool that lets you back up your entire system and then restore individual files or the entire drive. You can trigger manual backups or set them to run automatically. Backups can be stored on an external drive, another Mac, network storage, or an AirPort Time Capsule. Time Machine has not changed in years, so the process is the same no matter which version of macOS you’re running. The initial steps differ based on your backup media, so we’ll cover each type separately. External Drive 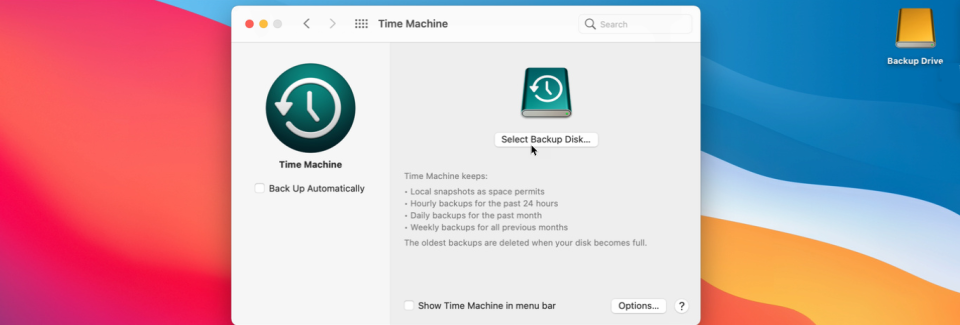 In the case of an external drive, plug it into your Mac and make sure its icon appears on the desktop. Open System Preferences and go to Time Machine > Select Backup Disk, then select the drive and click Use Disk. 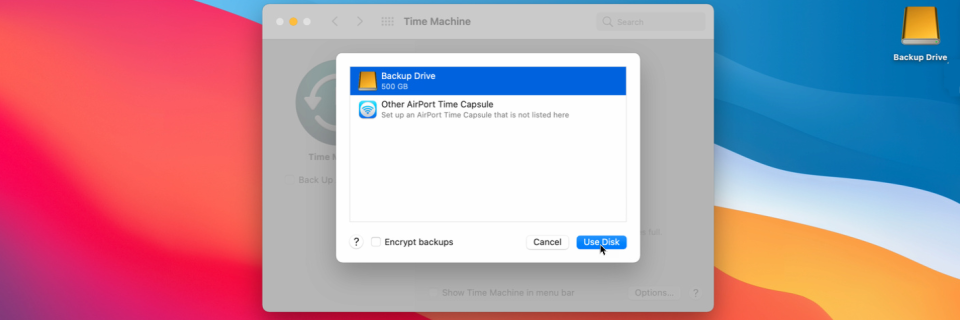 If the disk isn't formatted to support the Mac and Time Machine, you’re asked to erase the disk first. The drive is then prepared for backup. Another Mac 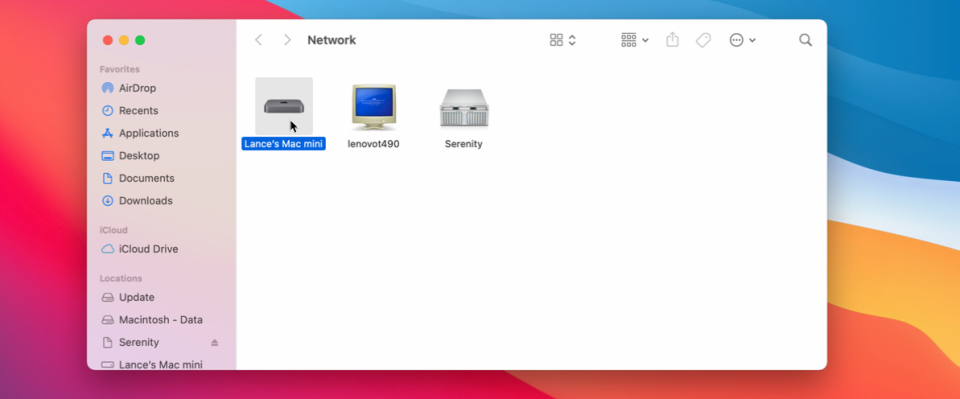 To use another Mac as your backup destination, you’ll need to create a shared folder on it to serve as the backup location. Apple can walk you through the steps. You then connect the two computers by opening Finder on the Mac you wish to back up and double-clicking the destination Mac listed under Network. 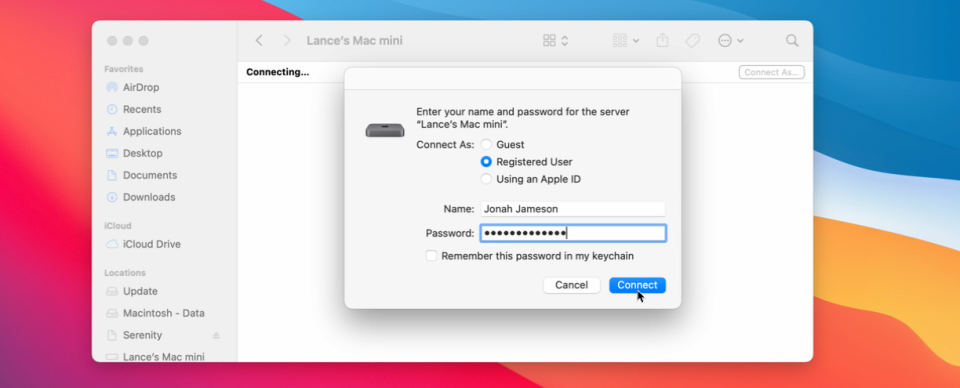 Enter the username and password for the destination Mac and click Connect. You should then see the shared folders on that Mac, including the backup folder you set up. 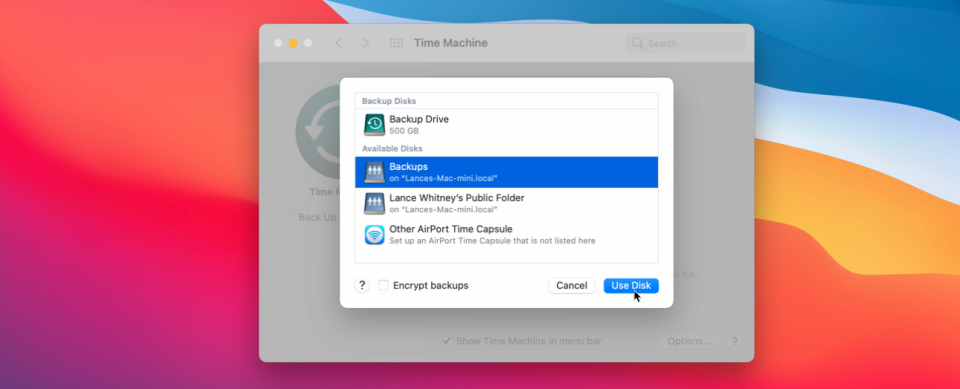 Open the Time Machine preferences on the Mac you want to back up. Click Select Disk, then choose the backup share on the destination Mac and click Use Disk. You’re then asked by Time Machine to enter the username and password for your destination Mac. Network Storage 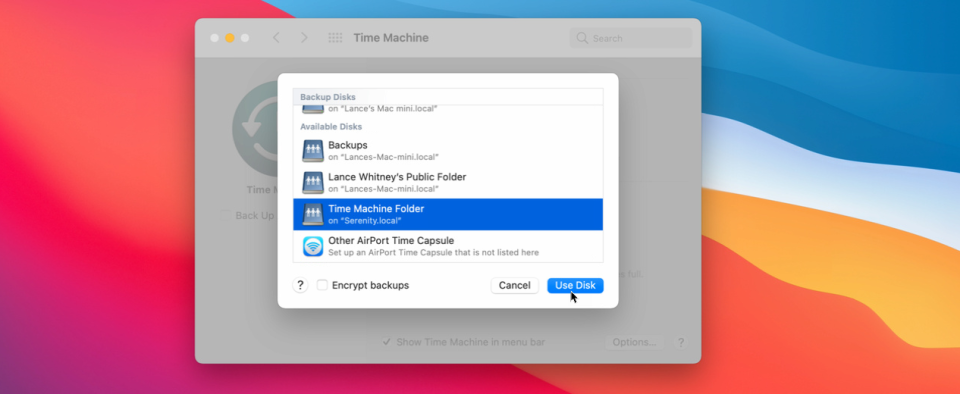 Backing up to a network attached storage device (NAS) can be tricky because Time Machine works only with certain volume types. If you own a Synology NAS, Synology supports Time Machine and provides a support page on how to use your NAS for backups. For other types of NAS drives and network storage, you may have to contact the vendor to find out if and how it can be used for Time Machine backups. If you’re able to use your network storage, open the Time Machine preferences on the Mac you want to back up. Click Select Disk and choose the backup share on your NAS or other network device. You’re then asked by Time Machine to enter the username and password for your network share. Backup Setup 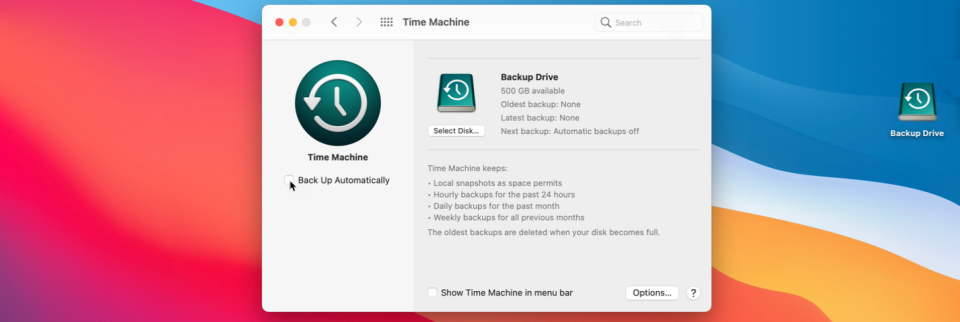 By default, the backups are set to run automatically. Time Machine keeps local backups based on available disk space, hourly backups for 24 hours, daily backups for a month, and weekly backups for all the past months. The oldest backups start to get deleted as you run out of space on your backup media. If you don’t want the backups to run automatically, uncheck the option for Back Up Automatically. You can also check the box next to Show Time Machine in menu bar for quicker access. 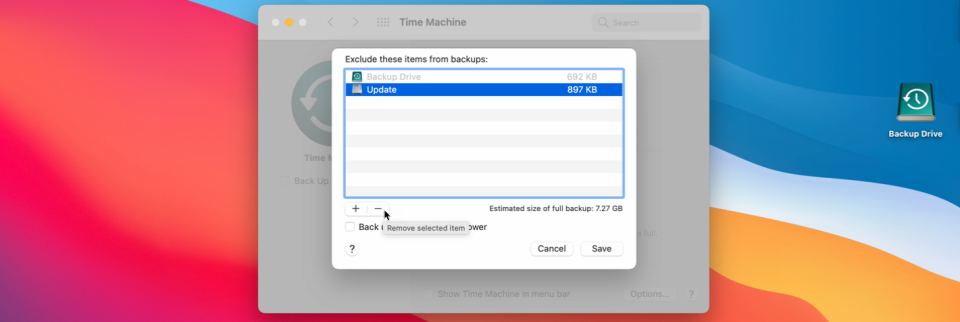 To view and control more settings, click the Options button. Here, you can choose any partitions that you don’t want to include in the backup and decide whether or not your Mac should be backed up when on battery power. Manual Backup 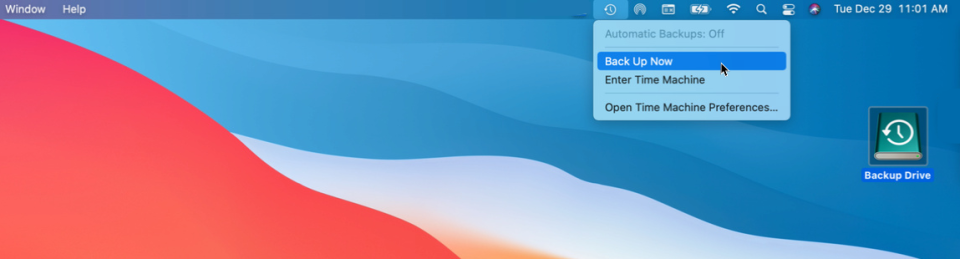 To perform a manual backup, click the Time Machine’s menu bar icon and select Back Up Now, or hold Ctrl and the icon for your backup drive and select Back Up Now. Your system is then backed up in the background. 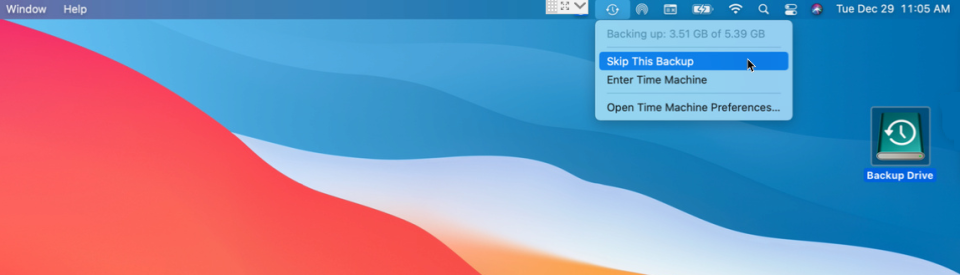 Now if you click the Time Machine icon in the menu bar, you can see the progress of the backup. Keep in mind that a backup run over a network will take much longer than a backup to a connected drive. You can stop the backup by selecting Skip This Backup. A notification will appear on the screen when the backup is completed. Restore Individual Files  To restore an individual file or multiple files from a backup, click the Time Machine icon in the menu bar and select Enter Time Machine. Several cascading windows pop up, with each window pointing to a different backup. Notice the two arrows to the right of the windows with a label that says Today (Now). This indicates the folder is the most recent version. Click the up arrow to go back in time to find a previous backup that has the files you need. Once you find the correct backup, select the folder with the files you wish to restore, then click the Restore button. The files are then restored to their original location. Restore Your Entire System 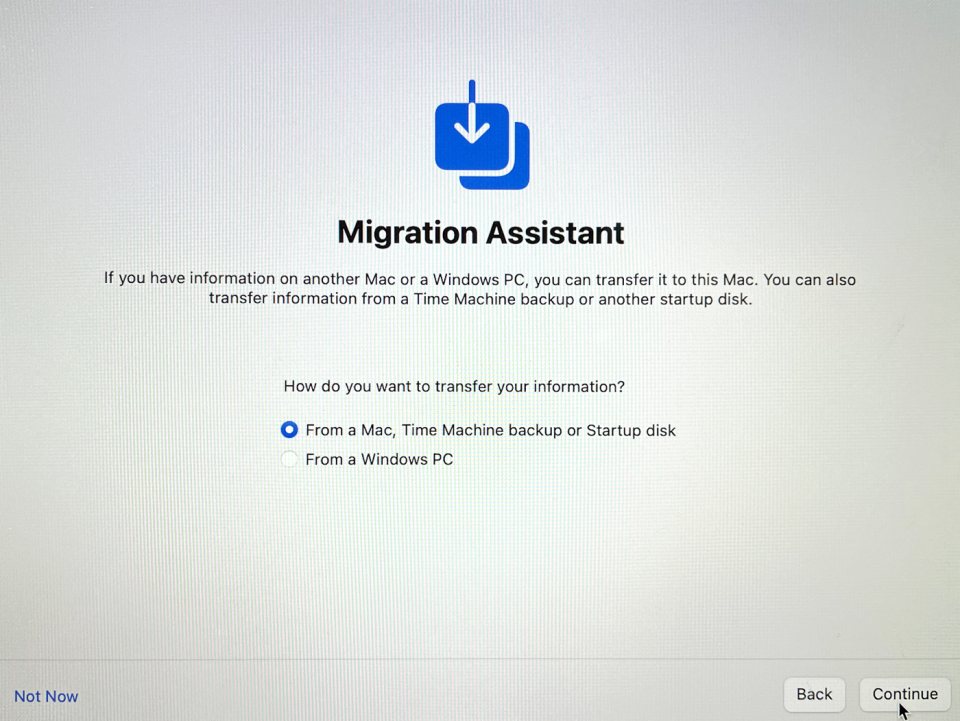 To restore your entire system from a backup, connect your Time Machine backup disk to your Mac. If the backup is on a network share, make sure your Mac is on the same network. You’ll then need to reinstall macOS as part of the factory reset process. Once the operating system is reinstalled, you can then transfer your existing data using the Migration Assistant. Choose From a Mac, Time Machine backup, or Startup disk from and click Continue. 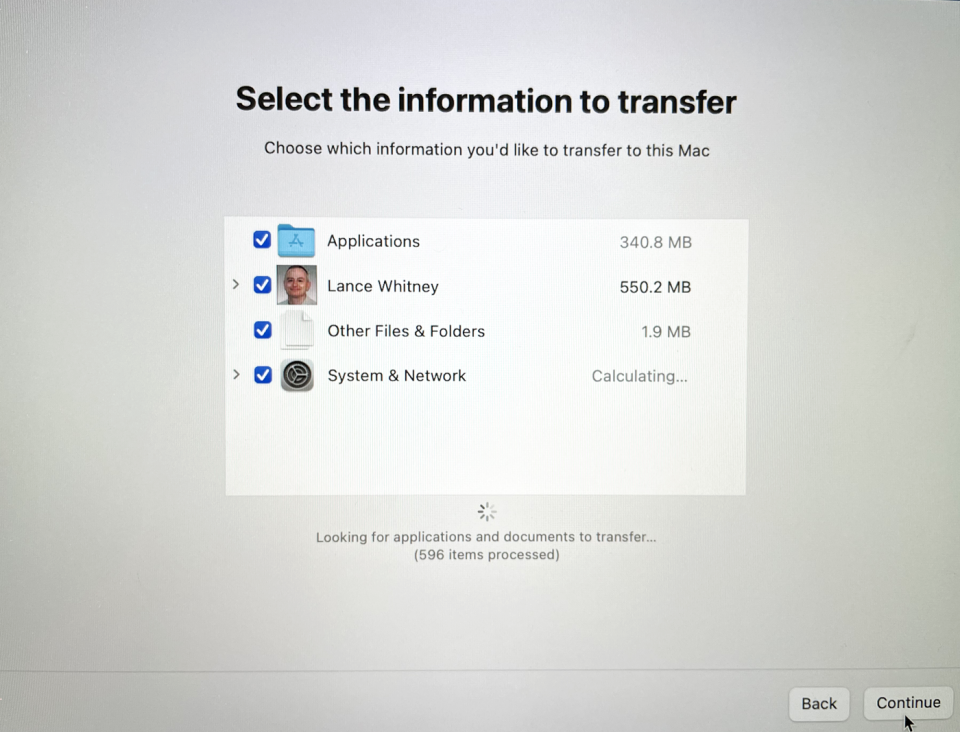 You then select your Time Machine backup media and click Continue. Confirm the information to transfer, deselecting any content you don’t want restored, then click Continue. Create a password for your account and click Continue. 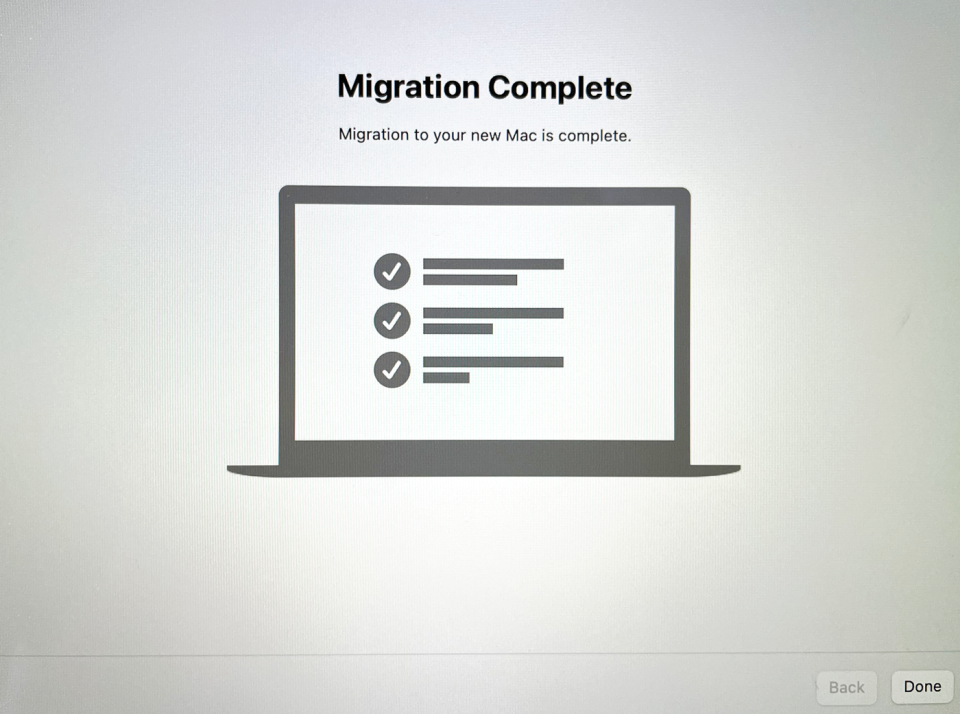 The information from your backup is then transferred and restored. You will see that the migration is complete. Click Done, sign back into your Mac, and finish the setup. Thanks: Lance Whitney - PCmag
0 Comments
Does your Chrome browser feel like it's running a bit slower than usual? These tips and tricks can help you give Google Chrome a speed boost  
Check Your Internet Speed Before you blame Chrome for your slowdowns, make sure your internet connection is up to snuff. Run a speed test like to see how your connection measures up. It's possible you're just experiencing a slowdown in your area, or you're on a crappy public network. (Or maybe you just need to pay for faster internet.) 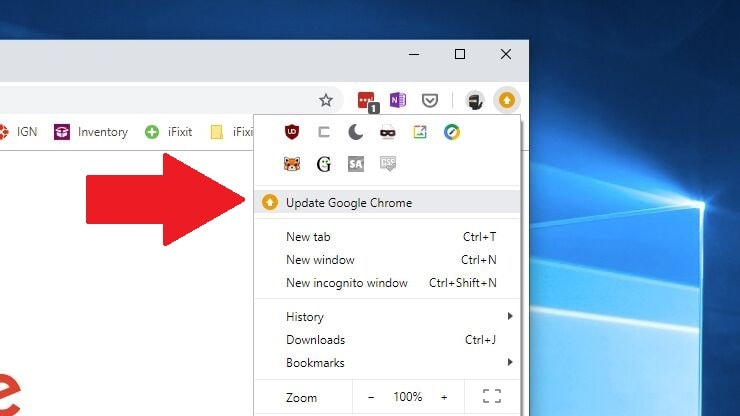
Update to the Latest Version of Chrome Each new version of Chrome contains new features, security fixes, and—often—performance improvements, so it's possible updating to the latest version may help your speed woes. Even if it doesn't, it'll keep you safer from online threats. Chrome updates itself automatically, so chances are you're already on the latest version, provided you've closed the browser recently. If you're behind, Chrome will display a yellow or red arrow in the upper right-hand corner of the browser. This means an update is waiting for you, so all you have to do is close out the browser window or click the arrow and choose Update Google Chrome to restart and get the update. It probably won't make any night-and-day speed differences, but it's a good place to start nonetheless. 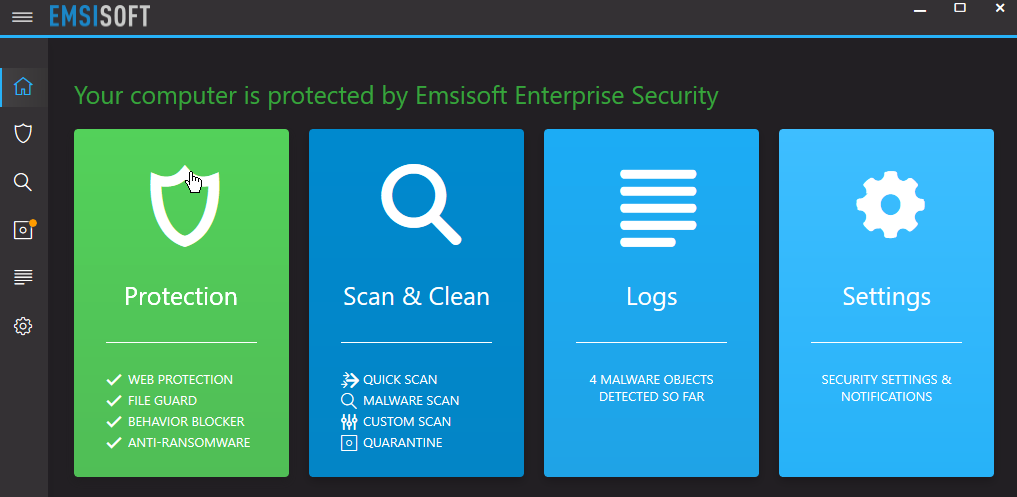
Run a Malware Scan Before you go digging into Chrome's settings, you might want to ensure you don't have any malware on your system. Run a scan with your anti-malware tool of choice and make sure there aren't any nefarious actors running in the background. These can shove extra advertisements into the pages you visit or track your behavior, which require resources—and thus can slow down your browser and computer. 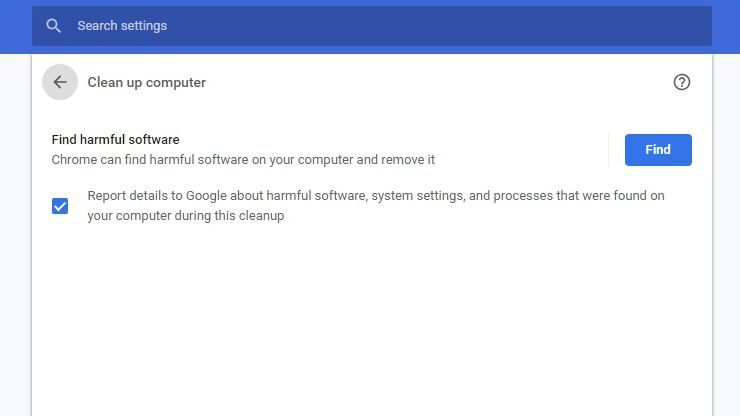
Run the Chrome Cleanup Tool Google developed a program called the Chrome Cleanup Tool, which would detect potentially unwanted programs (PUPs), like toolbars and other automatically installed extensions that your antivirus may not be designed to catch. Google has since integrated this directly into Chrome, and you can run it by going to Settings > Advanced > Reset and clean up > Clean up computer. Run the tool and it'll check your computer for any software that might be slowing down your browser. 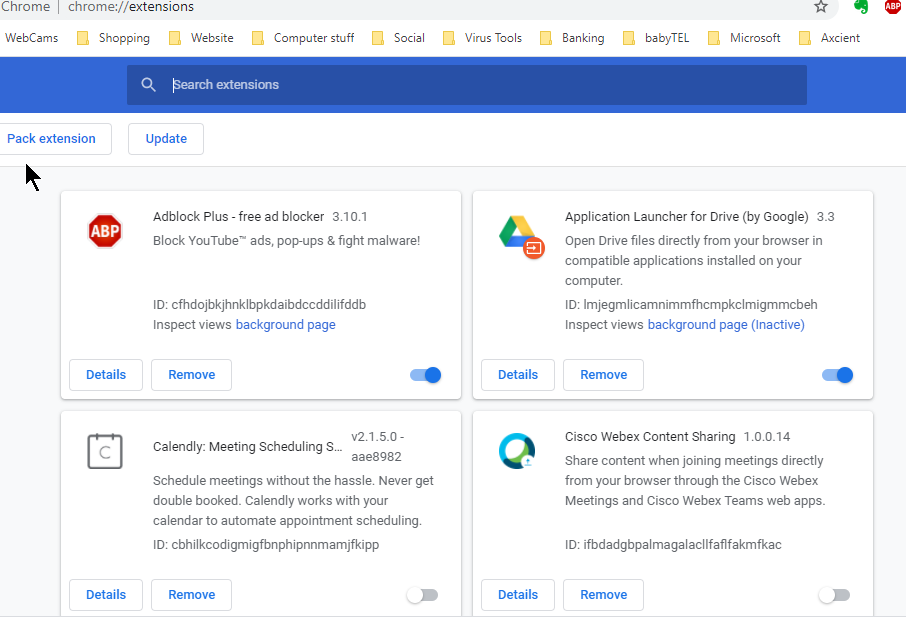
Uninstall Extensions You Don't Need One of the best things you can do to speed up Chrome is slim it down. Extensions and tabs are the biggest resource hogs, and the fewer you have, the snappier Chrome will feel. Let’s start with extensions: you can see which ones are taking up the most CPU and RAM by pressing Shift + Esc on your keyboard, which will bring up Chrome's Task Manager. Check out which ones are hogging the most resources, and which ones aren't crucial to your workflow. Uninstall extensions by right-clicking on their icon in the toolbar and selecting Remove from Chrome. Or go to chrome://extensions and remove them from there. The more you get rid of, the more of a speed boost you'll get (not to mention a security boost, since extensions can be hacked or sold to adware companies). 
Close (or Unload) Tabs You Aren't Using If you're the kind of person who opens 19 tabs and leaves them running for later, it's a good bet your slowdown is coming from having so many sites open in the background. Chrome can discard tabs if it runs out of memory, but in my experience, it isn't very aggressive about it. Close any tabs you don't need (once again, Shift + Esc is your friend), and bookmark them for later. You can also grab an extension like Auto Tab Discard, which allows you to automate the "unloading" of certain tabs based on different criteria and keep them in your tab bar, which you can then reload as you need them. Yes, I realize the irony of installing an extension when we just told you to uninstall as many as possible, but depending on how many tabs you tend to keep open, the result may still be a net positive speed increase for this particular case. 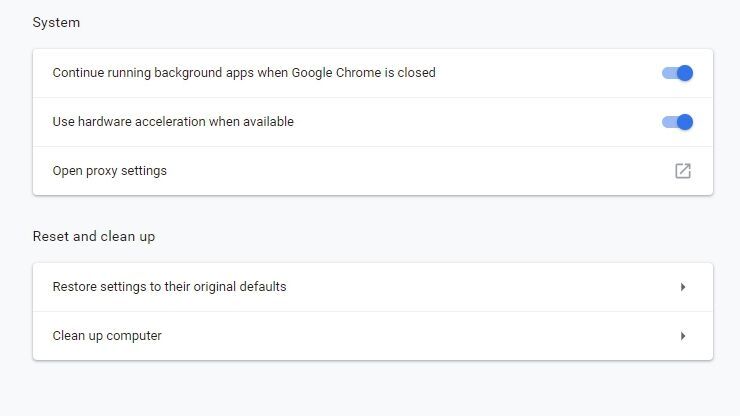
Wipe the Slate Clean If you still can't get Chrome to cooperate, it may be time to go nuclear and reset the browser to its original defaults—no extensions, custom search engines, or other saved settings. This can be a pain, but if you discover Chrome goes back to being zippy after resetting, you might be able to keep it tidier and prevent it from building up extra cruft (or at least determine which extension or settings caused things to slow down later). To perform a reset, head to Settings > Advanced > Reset and clean up > Restore settings to their original defaults > Reset settings. Of course, it may not be Chrome's fault at all—your computer may just be getting a little long in the tooth.  Losing your laptop is a costly inconvenience at best, and a significant threat to your digital security at worst.
While the practical consequences may vary depending on who gets their hands on your device — a petty thief who's just looking to pawn the hardware versus someone with the basic knowledge to hack your passwords (or worse) — there are a number of steps you can and should take to mitigate any possible damage. You can also implement preventive measures to minimize the security risk if your laptop is ever lost or stolen. Change your account passwords. This is the first step most security experts recommend if you lose possession of your laptop. If someone else can log into your device, then they'll likely have access to most or all of your online accounts — especially if you use your device's or browser's keychain to autofill your usernames and passwords. Start with your email password. Make that password long, strong and unique. Your email account is the key to your other accounts, as a thief can use it to reset login information. Then enable two-factor authentication (2FA) on your email account if you haven't already. You'll also want to prioritize global logins, like those on your Apple ID or Microsoft accounts, that grant access to other data and services. Once your email account is secure, start working your way through other accounts, including social media and bank logins. Clear autofill from your browsers. If you have autofill enabled in your web browsers, all a thief need do to access your accounts is open that browser. Turn off automatic sign-in options and delete your saved passwords. To do this in Chrome, go to chrome://settings/passwords and toggle off Auto Sign-in. You can also clear your browsing data to remove saved logins from any devices that sync with your Google account and sign out of Chrome remotely. Firefox and Safari have similar options in their preferences and settings menus. You should also remove all saved payment information from your online e-commerce accounts, such as Amazon. Deauthorize your device. You may also be able to remotely revoke your laptop's access to online services. Apple has an option to remove devices logged into your Apple ID. You can remove computers from Google's trusted device list, deregister devices from your Amazon account and log out remotely from Facebook. A quick Google search will bring up instructions for other services — a good bet for those you use to log into other third-party sites. You can also turn off any auto-sync features between linked devices, such as your phone and tablet, to prevent your information from being updated on your missing laptop. Track your laptop's location and use remote-wipe features. This tip generally only works if your lost device connects to the internet, which makes it more useful for mobile devices. But if your laptop does go online, you can use built-in "find my device" features to locate and control it. If "Find My" is enabled in advance through iCloud for your Apple computer, you can see connected devices on a map and take several actions to secure them, including marking them as lost (which locks them and disables Apple Pay) and activating remote erase. Windows users have similar options to locate and lock devices from afar. There are also third-party programs like Prey that give you options for remote control. Notify your financial institutions. Just as you would if you lost your physical wallet, contact your bank and credit-card companies about any financial accounts that autofill when you make a purchase or that you have saved on e-commerce sites. You can freeze your debit and credit cards and let your financial institutions know about the possibility of suspicious activity. In the meantime, you should also keep track of your account activity by checking it online every couple of days after your laptop goes missing. If personal information such as tax returns, bank account numbers or Social Security numbers are on the stolen laptop, then consider freezing your credit records. Notify your employer. If you lose your work computer, let your employer know immediately. Your company may have specific protocols to follow, additional options to track or wipe the device, or software installed that can recover your data. Plus, your work laptop is your employer's property — not yours. File a police report — and report the loss to the manufacturer. Truthfully, this step may not yield results, but it's possible that your device can be recovered if someone tries to sell it or get tech support. File a report with local law enforcement, who may request your laptop's serial number (more on that in a minute). Both ASUS and Dell will open stolen device cases. A police report may also be required if you want to submit an insurance claim. Steps for prevention. You can't predict whether your laptop will be lost or stolen, but you can take preventive steps to protect it if it ever is.
The goal is to make it difficult for someone to get your valuable information from a lost or stolen laptop, Tarighat says. Putting up as many barriers as possible — requiring a thief to break into your operating system, overcome 2FA, unencrypt your hard drive and break lots of individual unique passwords — can help protect your data. Thanks Tom's Guide  Taking a proactive approach to security can help reduce the risk of a ransomware incident. Businesses of all sizes should implement, enforce and regularly test the following preventative measures:
Credential hygiene: Practicing good credential hygiene can help prevent brute force attacks, mitigate the effects of credential theft and reduce the risk of unauthorized network access. Principle of least privilege: All organizations should adhere to the principle of least privilege, a security concept in which users, programs and processes are given only the bare minimum privileges necessary to perform their tasks. Employee training: Because ransomware frequently spreads through user-initiated actions, companies should provide regular cybersecurity training with an emphasis on phishing, malicious email attachments and other social engineering tactics. Multi-factor authentication (MFA): MFA should be made mandatory wherever possible to reduce the risk of unauthorized access. Review Active Directory: Organizations should regularly review the Active Directory (AD) to locate and close existing backdoors such as compromised service accounts, which often have administrative privileges and are a popular target for attackers who wish to obtain credentials. Network segregation: Effective network segregation is crucial for containing incidents and minimizing disruption to the wider business. Secure remote access: As RDP is an extremely popular attack vector, organizations must take steps to secure remote access (or disable it if it is not required). Remote access should only be available via certain networks or MFA-enabled VPN, and limited only to users who require it for their work. Avoid BYOD: Implementing and strictly enforcing security protocols on employees’ personal devices is extremely challenging. Ideally, companies should provide dedicated devices and hardware and discourage employees from using personal devices for work-related tasks. PowerShell: PowerShell is one of the most common tools used by ransomware gangs to move laterally within a target network and should be uninstalled if possible. If PowerShell is required, it must be very closely monitored via endpoint detection and response systems. Administrators should be aware of every single PowerShell script that is running on their endpoints. Cybersecurity insurance: Organizations should consider cybersecurity insurance to help mitigate the impact of a ransomware incident. Cybersecurity insurance can be particularly beneficial for MSPs, which are often responsible for protecting other companies’ data. Some cyber insurance companies lean toward readily paying ransoms, while others prefer to explore other remediation options, so companies should talk to prospective insurers and discuss policies before committing to an insurance provider. Incident response procedures should be tested regularly to ensure that employees are familiar with security processes and understand exactly what to do in the event of an infection. Testing also helps companies identify and rectify flaws in the response chain. The worst time for a company to try and work out what to do in a ransomware attack is during a real ransomware attack. Conclusion A proactive approach to ransomware prevention can help companies significantly reduce the risk of infection. In the event of an incident, organizations must have effective response procedures in place to contain the incident, prevent data loss and safely initiate the recovery process. The practices described in this article can help businesses of all sizes mitigate the impact of a ransomware attack. Do note, however, that these procedures should be considered general and non-comprehensive advice. Security requirements can vary significantly and security systems should always be tailored according to industry, regulatory requirements and the company’s unique security needs. |
|
2951 Britannia crescent
Port Coquitlam BC, V3B 4V5 778-776-6222 Hours of operation Mon - Fri 9 a.m. - 6 p.m. Sat 11 a.m. - 5 p.m. (by appointment only) Sunday & Holidays - Closed |
Business Number 778569517BC0001 - © Copyright CompuBC, All Rights Reserved.
|