|
With Windows 10's File History, you can automatically back up important files and documents to an external location and recover them in a pinch.  If a critical and irreplaceable file you were viewing the other day is lost or will no longer open, you would be in trouble if not for Windows 10’s File History feature. It can automatically save specific file folders to a backup device, thus allowing you to recover a previous version of a file should it go missing or become corrupted and unusable. Here’s how to set up File History and save your important documents, photos, and files before something goes wrong. Set Up Storage Device First, make sure you have a viable drive connected to or accessible from your PC. This could be a simple flash drive, an external drive, or a network location on a Network Attached Storage drive. If your drive plugs into the computer, make sure to connect it before trying anything else. For a wireless network drive, it must be connected to power and properly mapped. 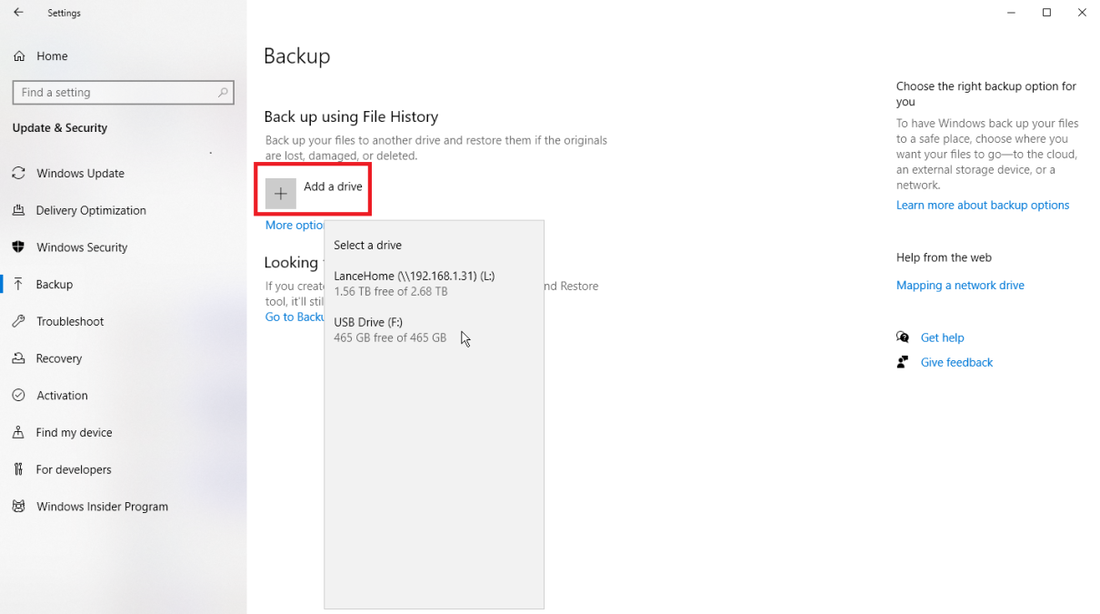 Set Up File History In Windows 10, click the Start button, go to Settings > Update & Security > Backup, then click Add a drive under the Back up using File History section. Assuming you've connected a workable backup device, Windows displays a list of all such locales. Select the location you wish to use for your backups. 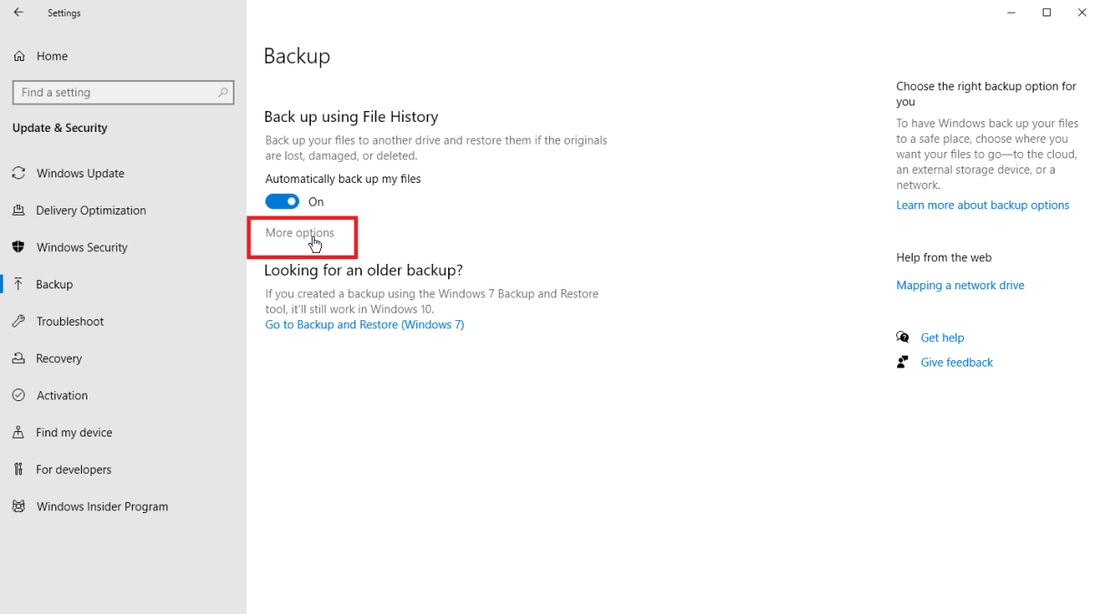 File History is now enabled, though it's not yet backing up any files. Click More options to set up a few parameters. At the top of the File History window, click the Back up my files drop-down menu and choose how frequently you wish to back up your files, from every 10 minutes to Daily. 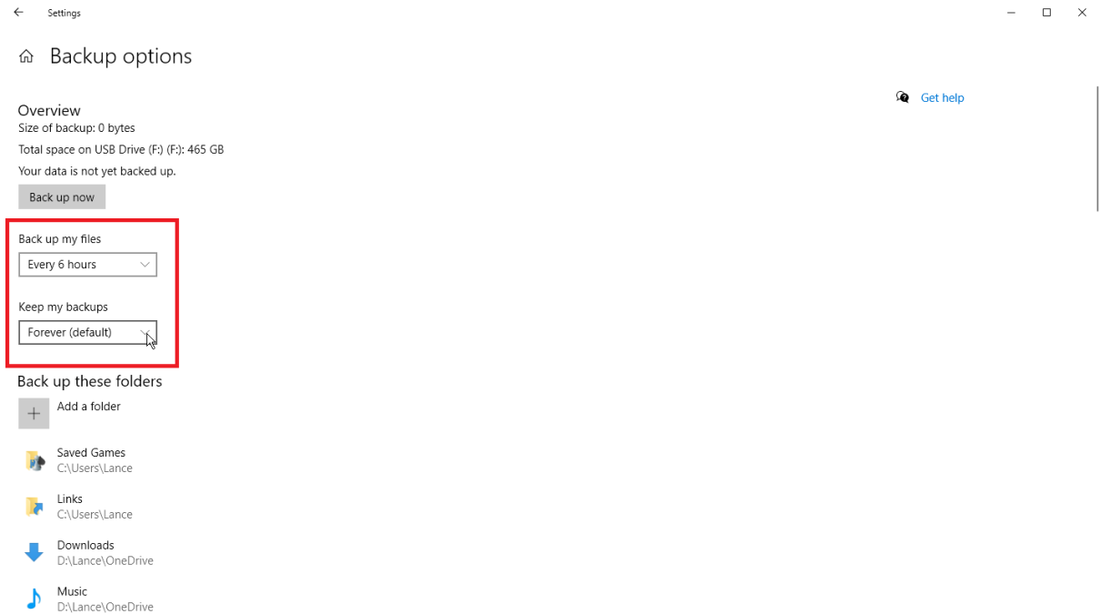 Then click the Keep my backups drop-down menu, and select how long you want to retain your backed up files—anything from Until space is needed to Forever. Manage Folders 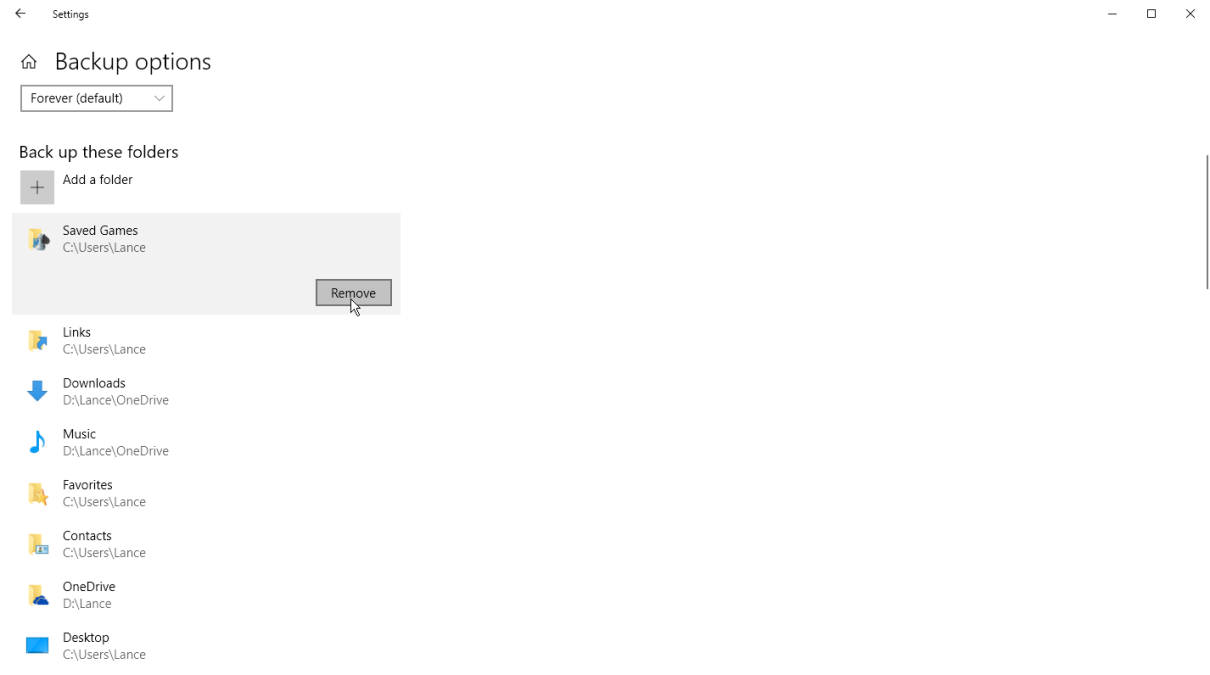 By default, File history will begin backing up a selection of default folders, including Desktop, Downloads, Music, and more. However, you can also remove some of these folders from the mix. Scroll down the Backup options window and review the list of default folders already included in the backup. Select any folder you don't wish to back up and then click the Remove button to exclude it. 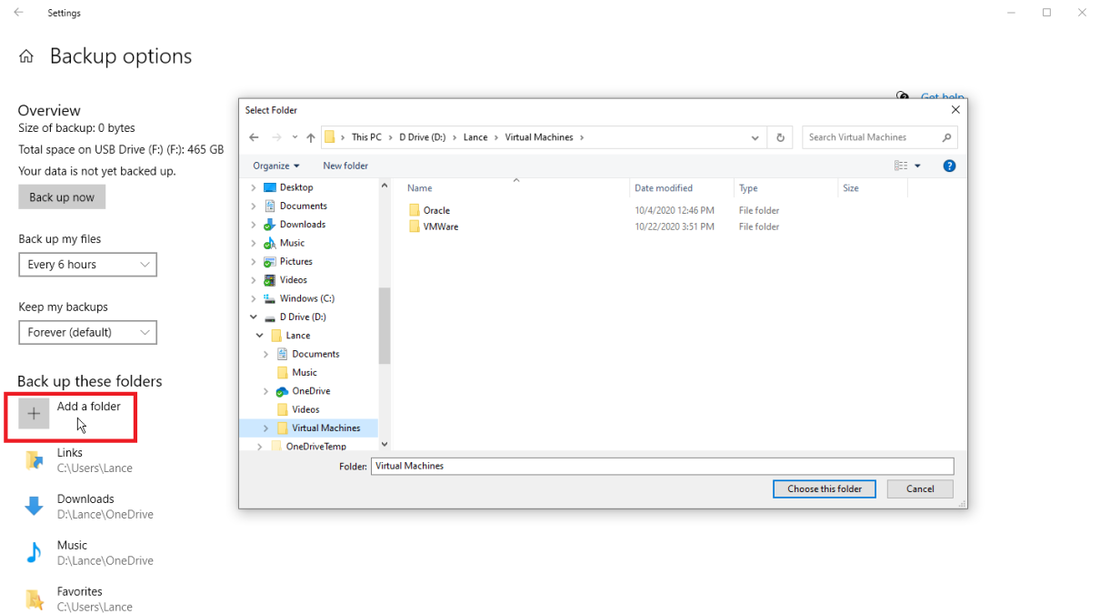 You can add your own custom folders by clicking the Add a folder button under the Back up these folders heading. From File Explorer, select any folders not included in the backup that you wish to add. 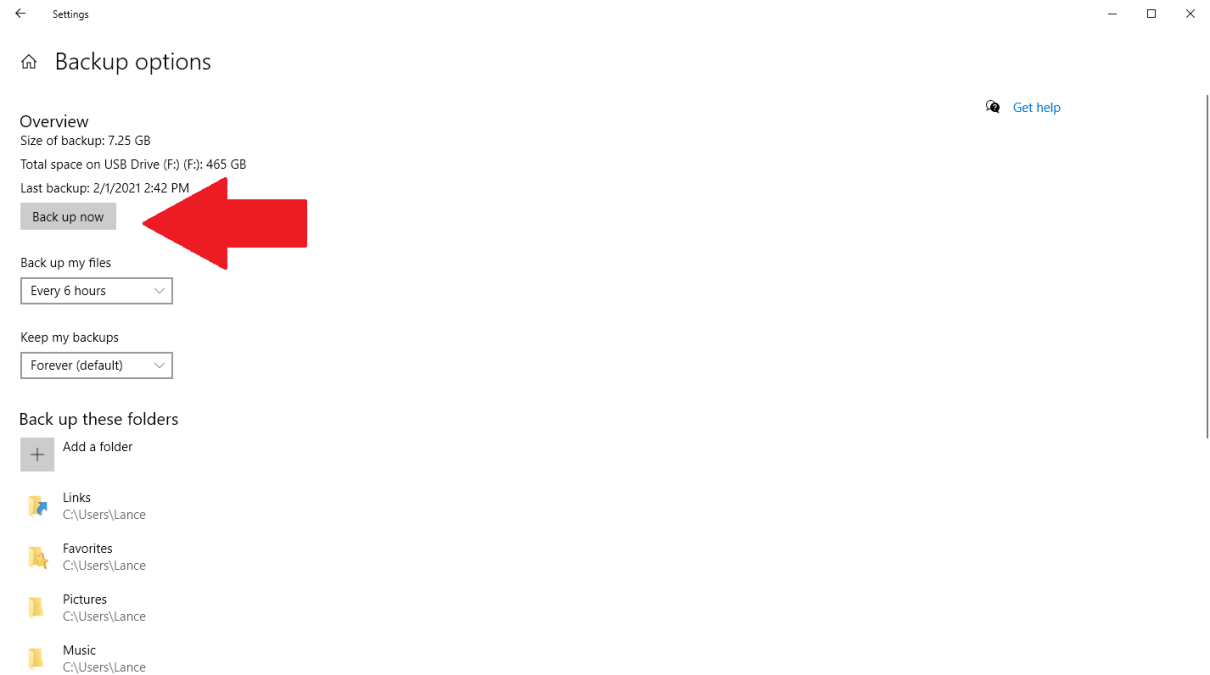 Once you’re all set, click the Back up now button at the top of the screen and Windows will start backing up these files included in your backup set. After your backup has finished, Windows displays the total size and the date and time of the backup. Restore Files 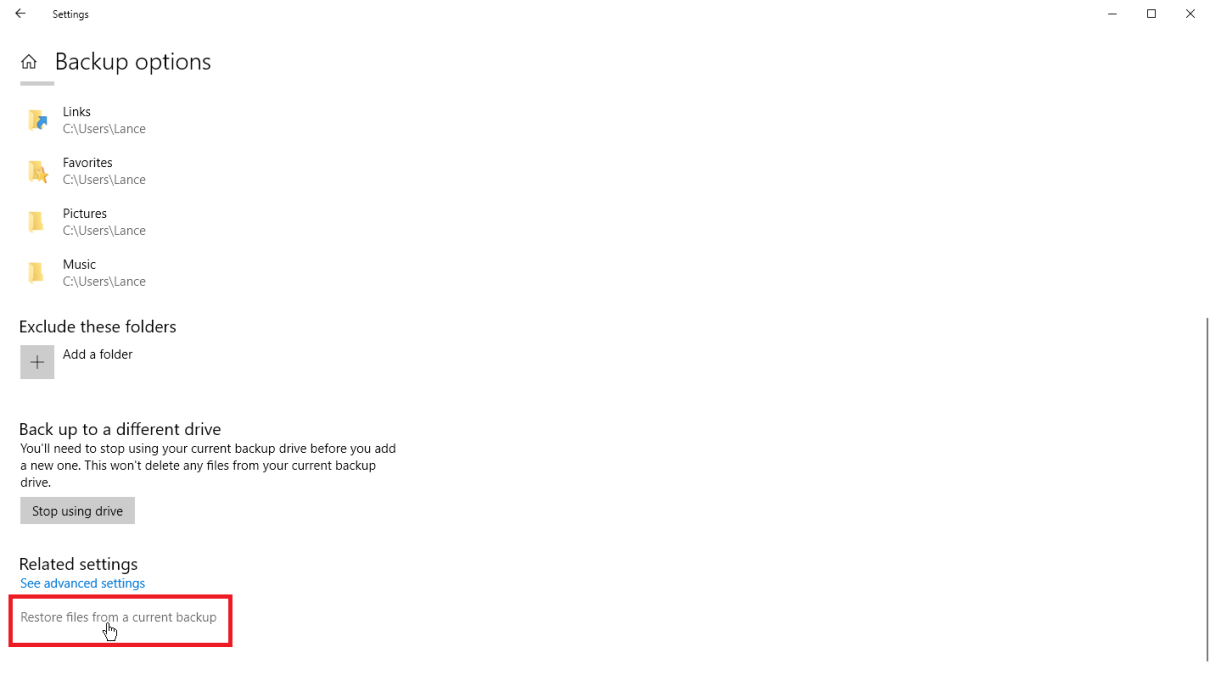 Now, if that vitally important file goes missing or has become corrupted, you can use your File History backup to restore it. Go back to Settings > Update & Security > Backup and click More options again. Scroll down to the bottom of the File History window and click the Restore files from a current backup link. 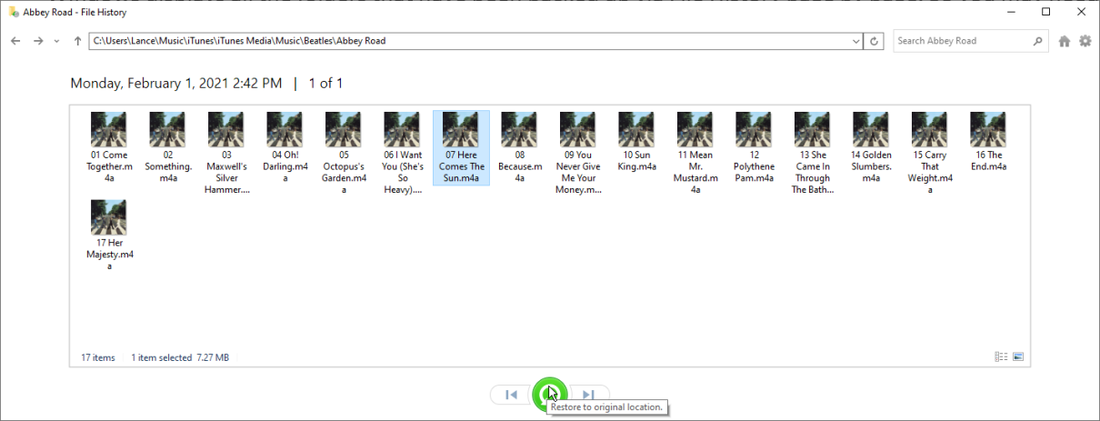 Windows displays all the folders that have been backed up by File History. You may need to scroll through a few pages in order to find the file you seek. Double-click the folder you want, then double-click the file to view it. If it's the file you need, click the green button with the white arrow at the bottom of the window to restore the file. 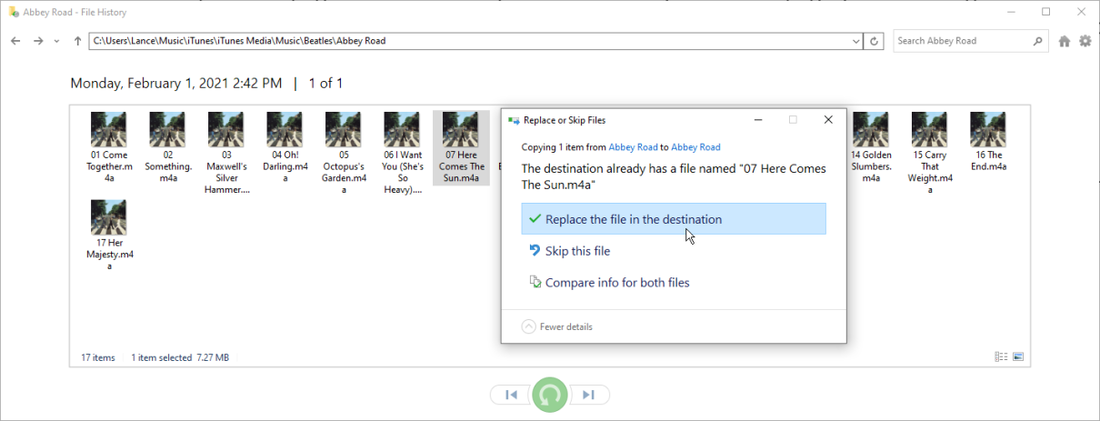 If the file still exists in its original location, Windows asks if you want to replace it, skip it, or compare both files. If the original file is gone, Windows automatically restores it to its previous location. Thanks to Lance Whitney from PCMag
1 Comment
|
|
2951 Britannia crescent
Port Coquitlam BC, V3B 4V5 778-776-6222 Hours of operation Mon - Fri 9 a.m. - 6 p.m. Sat 11 a.m. - 5 p.m. (by appointment only) Sunday & Holidays - Closed |
Business Number 778569517BC0001 - © Copyright CompuBC, All Rights Reserved.
|