 As your business grows, the amount of data that it needs to store and manage also grows. Storing this data on loose hard drives and individual workstations will no longer cut it: Your team needs ready data access, protection from loss, and capacity for future growth. The easiest way to provide all three quickly and easily is network attached storage (NAS). No matter where you’re starting, the number of choices and features NAS systems offer today are overwhelming, especially when you’re trying to buy something that will work now and in the future. This post aims to make your process a little easier. The following content will help you:
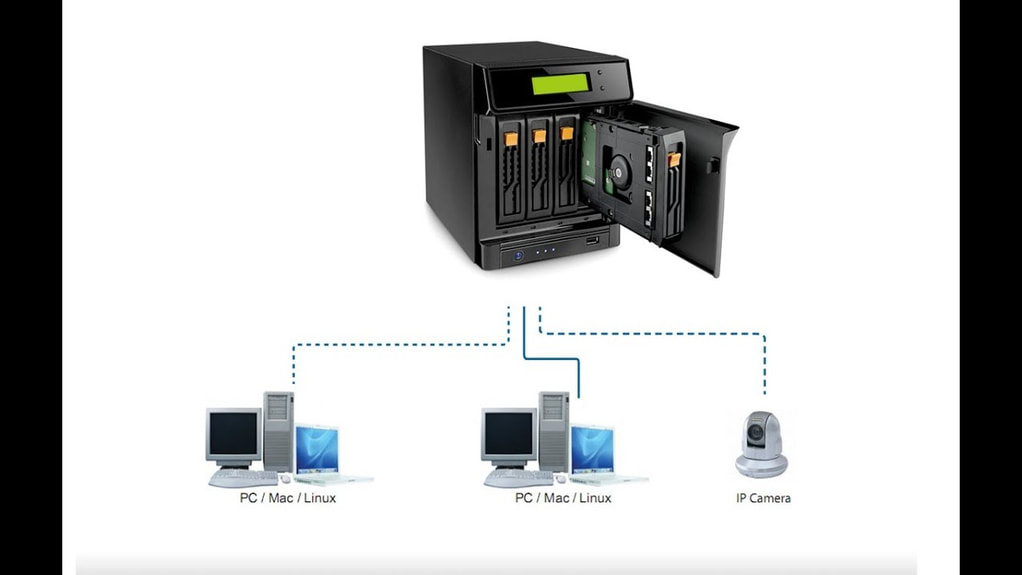 How Can NAS Benefit Your Business? There are multiple benefits that a NAS system can provide to users on your network, but we’ll recap a few of the key advantages here.
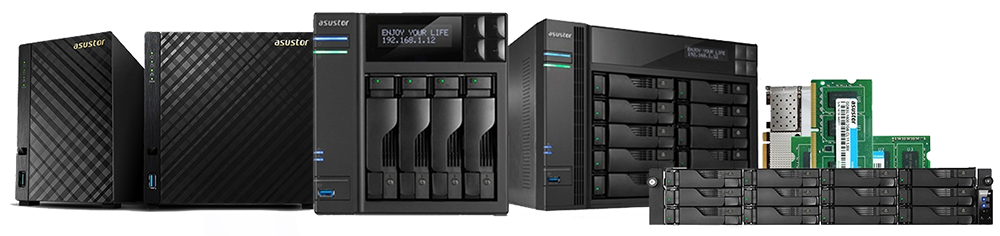
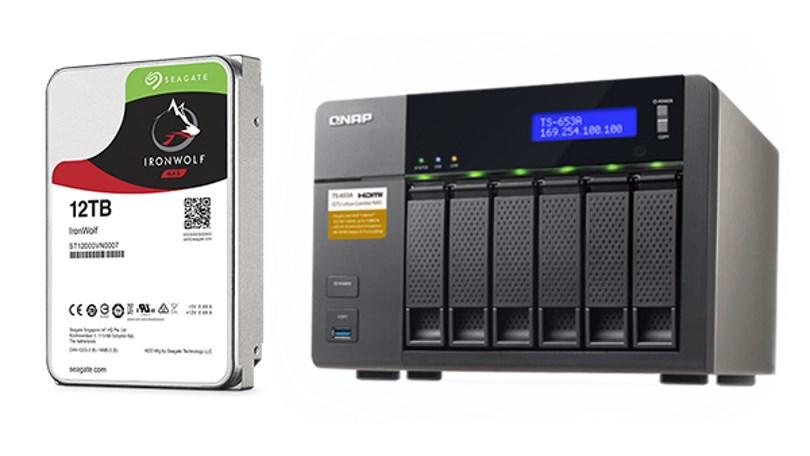
 How do you evaluate the differences between different NAS vendors? Or even within a single company’s product line? We’re here to help. This tour of the major components of a NAS system will help you to develop a tick list for the sizing and features of a system that will fit your needs. Choosing a NAS: The Components How your NAS performs is dictated by the components that make up the system, and capability of future upgrades. Let’s walk through the different options. NAS Storage Capacity: How Many Bays Do You Need? One of the first ways to distinguish between different NAS systems is the number of drive bays a given system offers, as this determines how many disks the system can hold. Generally speaking, the larger the number of drive bays, the more storage you can provide to your users and the more flexibility you have around protecting your data from disk failure. In a NAS system, storage is defined by the number of drives, the shared volume they create, and their striping scheme (e.g. RAID 0, 1, 5, 6, etc.). For example, one drive gives no additional performance or protection. Two drives allows the option of simple mirroring. Mirroring is also referred to as RAID 1, when one volume is built from two drives, allowing for the failure of one of those drives without data loss. Two drives also allows for striping—referred to as RAID 0—when one volume is “stretched” across two drives, making a single, larger drive that also gives some performance improvement, but increases risk because the loss of one drive means that the entire volume will be unavailable. 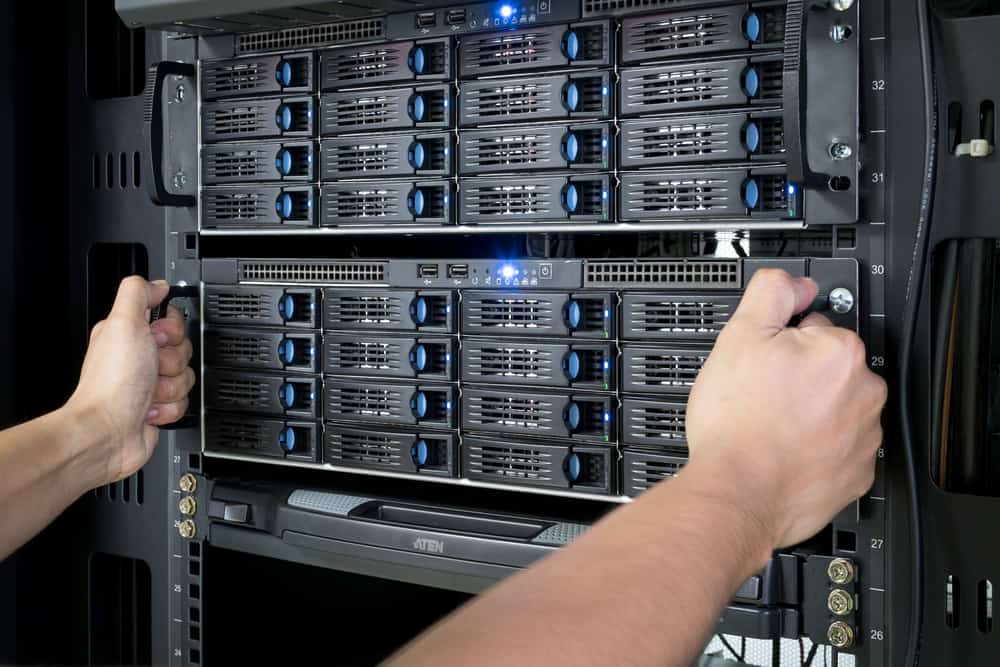 Three drives is the minimum for RAID 5, which can survive the loss of one drive, though four drives is a more common NAS system configuration. Five drives allow for RAID 6, which can survive the loss of two drives. Six to eight drives are very common NAS configurations that allow more storage, space, performance, and even drive sparing—the ability to designate a stand-by drive to immediately rebuild a failed drive. Many believe that, if you’re in the market for a NAS system with multiple bays, you should opt for capacity that allows for RAID 6 if possible. RAID 6 can survive the loss of two drives, and delivers performance nearly equal to RAID 5 with better protection. It’s understandable to think: Why do I need to prepare in case two drives fail? Well, when a drive fails and you replace it with a fresh drive, the rebuilding process to restore that drive’s data and parity information can take a long time. Though it’s rare, it’s possible to have another drive fail during the rebuilding process. In that scenario, if you have RAID 6 you’re likely going to be okay. If you have RAID 5, you may have just lost data. When buying a NAS system with drives provided:
If you choose to buy drives separately from your NAS:
 Selecting Drive Capacity for the NAS: What Size of Drives Should You Buy? You can quickly estimate how much storage you’ll need by adding up the hard drives and external drives of all the systems you’ll be backing up in your office, adding the amount of shared storage you’ll want to provide to your users, and factor in any growing demand you project for shared storage. If you have any historical data under management from previous years, you can calculate a simple growth rate. But, include a buffer as data growth accelerates every year. Generally speaking, price out systems at two or four times the size of your existing data capacity. Let’s say that your hard drives and external drives to back up, and any additional shared storage you’d like to provide your users, add up to 20TB. Double that size to get 40TB to account for growth, then divide by a common hard drive size such as 10TB. With that in mind, you can start shopping for four bay systems and larger. If your budget allows, opting for larger drives and more drive bays will give you more storage overhead that you’ll surely grow into over time. Factor in, however, that if you go too big, you’re paying for unused storage space for a longer period of time. And if you use GAAP accounting, you’ll need to capitalize that investment over the same time window as a smaller NAS system which will hit your bottom line on an annual basis. If your cash budget is tight you can always purchase a NAS system with more bays but smaller drives, which will significantly reduce your upfront pricing. You can then replace those drives in the future with larger ones when you need them. Hard drive prices generally fall over time, so they will likely be less expensive in the future. You’ll end up purchasing two sets of drives over time, which will be less cash-intensive at the outset, but likely more expensive in the long run. Similarly, you can partially fill the drive bays. If you want to get an eight bay system, but only have the budget for six drives, just add the other drives later. One of the best parts of NAS systems is the flexibility they allow you for right-sizing your shared storage approach. Estimate how much storage you’ll need, add the amount of shared storage you’ll want to provide to your users, and factor in growing demand for shared storage—then balance long term growth potential against cash flow. 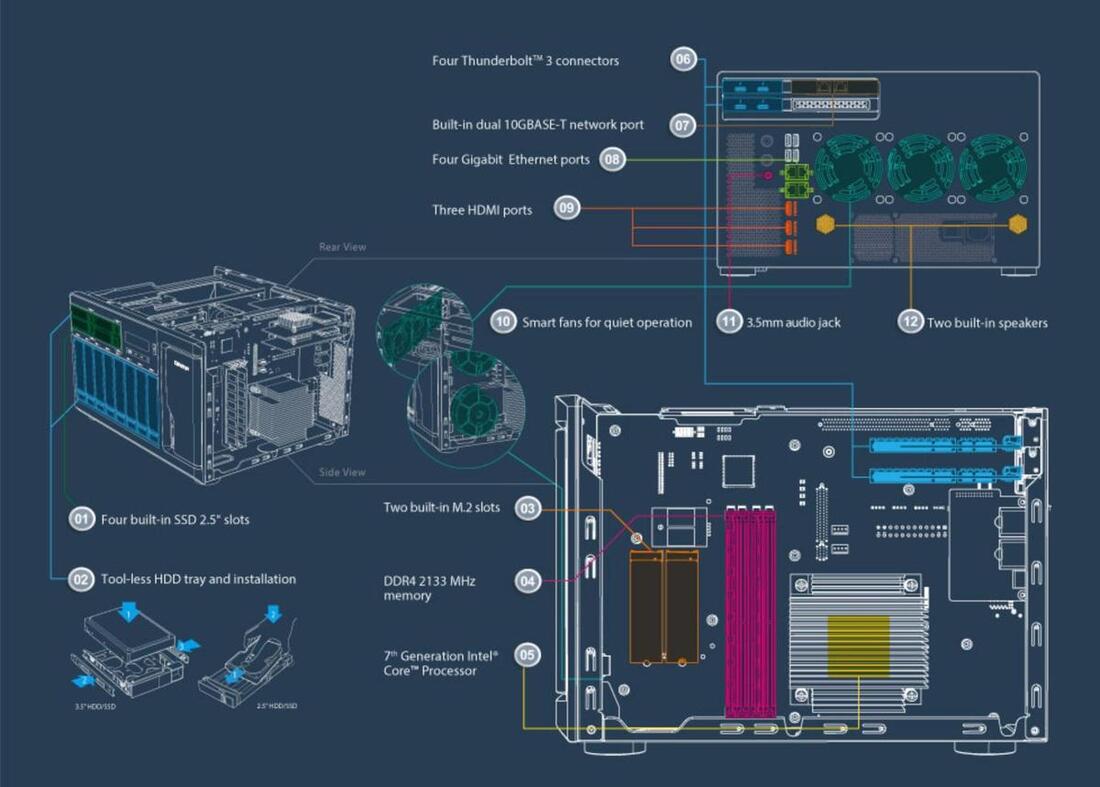 Processor, Controllers, and Memory: What Performance Levels Do You Require? Is it better to have big onboard processors or controllers? Smaller, embedded chips common in smaller NAS systems provide basic functionality, but might bog down when serving many users or crunching through deduplication and encryption tasks, which are options with many backup solutions. Larger NAS systems typically stored in IT data center racks usually offer multiple storage controllers that can deliver the fastest performance and even failover capability.
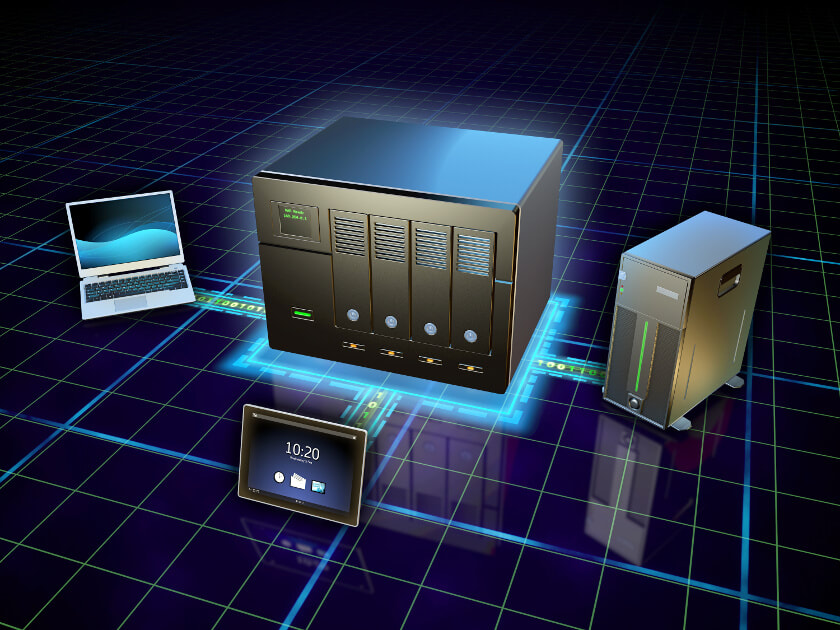
So if you’re just looking for basic storage expansion, the entry-level systems with more modest, basic chips will likely suit you just fine. If deduplication, encryption, sync, and other functions many NAS systems offer as optional tools are part of your future workflow, this is one area where you shouldn’t cut corners. If you have the option to expand the system memory, this can be an easy performance upgrade. Generally, the higher the ratio of memory to drives will benefit the performance of reading and writing to disk and the speed of on-board applications. Entry-level NAS systems provide good basic functionality, but you should ensure your components are up to the challenge if you plan to make heavy use of deduplication, encryption, compression, and other functions. 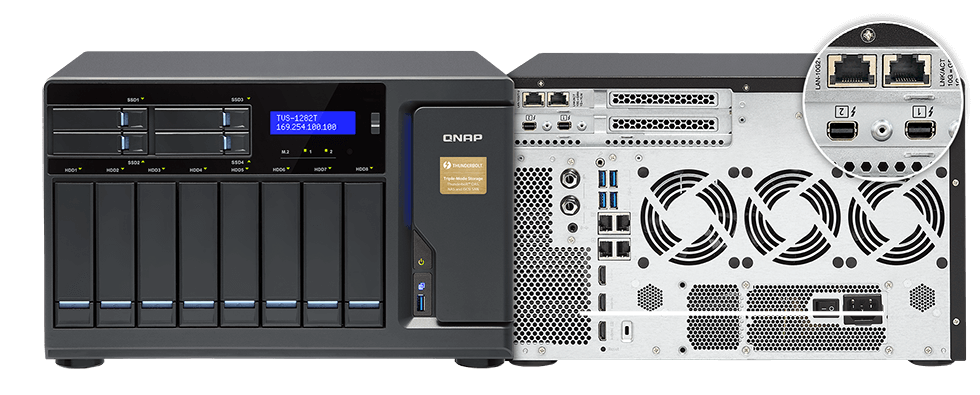 Network and Connections: What Capacity for Speed Do You Need? A basic NAS will have a Gigabit Ethernet connection, which you will often find listed as 1GigE. This throughput of 1 Gb/s in network speeds is equivalent to 125 MB/s coming from your storage system. That means that the NAS system must fit storage service to all users within that limitation, which is usually not an issue when serving only a few users. Many systems offer expansion ports inside, allowing you to purchase a 10GigE network card later to upgrade your NAS. Some NAS vendors offer 2.5 Gb/s, or 5 Gb/s connections on their systems—these will give you more performance than 1GigE connections, but usually require that you get a compatible network switch, and possibly, USB adapters or expansion cards for every system that will connect to that NAS via the switch. If your office is already wired for 10GigE, make sure your NAS is also 10GigE. Otherwise, the more network ports in the back of the system, the better. If you aren’t ready to get a 10GigE capable system now, but you think you might be in the future, select a system that has expansion capability. Some systems provide another option of Thunderbolt connections in addition to Ethernet connections. These allow laptops and workstations with Thunderbolt ports to directly connect to the NAS and offer much higher bandwidth—up to 40GigE (5 GB/s)—and are good for systems that need to edit large files directly on the NAS, such as is often the case in video editing. If you’ll be directly connecting systems that need the fastest possible speeds, select a system with Thunderbolt ports, one per Thunderbolt-connected user. It’s best to have more network ports in the back of your system. Or, select a system with network expansion card capability. 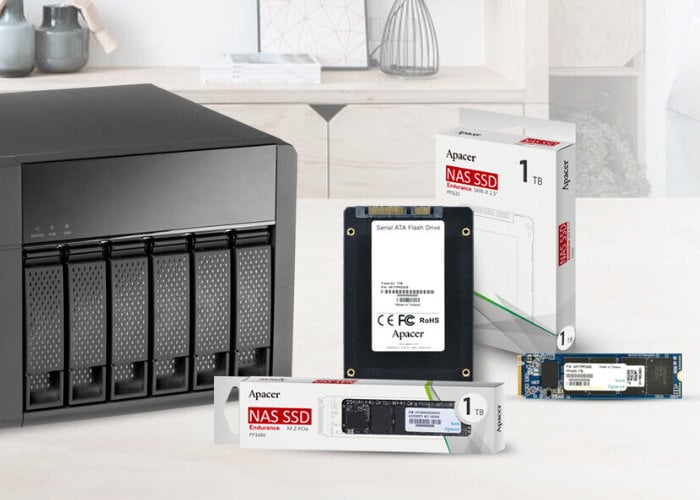 Caching and Hybrid Drive Features: How Fast Do You Need to Serve Files? Many of the higher-end NAS systems can complement standard 5.25” hard drives with higher performing, smaller form factor SSD or M.2 drives. These smaller, faster drives can dramatically improve the NAS file serving performance by caching files in most recent, or most frequently requested files. By combining these different types of drives, the NAS can deliver both improved file serving performance, and large capacity. As the number of users you support in each office grows, these capabilities will become more important as a relatively simple way to boost performance. Like we mentioned earlier, you can purchase a system with these slots unpopulated and add them in later. Combine different types of drives, like smaller form factor SSD or M.2 storage with 5.25” hard drives to gain improved file serving performance. Operating System: What Kind of Management Features Do You Require? Many of the higher-end NAS systems can complement standard 5.25” hard drives with higher performing, smaller form factor SSD or M.2 drives. These smaller, faster drives can dramatically improve the NAS file serving performance by caching files in most recent, or most frequently requested files. By combining these different types of drives, the NAS can deliver both improved file serving performance, and large capacity. As the number of users you support in each office grows, these capabilities will become more important as a relatively simple way to boost performance. Like we mentioned earlier, you can purchase a system with these slots unpopulated and add them in later. Combine different types of drives, like smaller form factor SSD or M.2 storage with 5.25” hard drives to gain improved file serving performance. Operating System: What Kind of Management Features Do You Require? The NAS operating systems of the major vendors generally provide the same services in an OS-like interface delivered via an on-board web server. By simply typing in your NAS’s IP address, you can sign in and manage your system’s settings, create and manage the storage volumes, set up groups of users on your network who have access, configure and monitor backup and sync tasks, and more. If there are specific user management features in your IT environment that you need, or want to test how the NAS OS works, you can test them by spinning up a demonstration virtual machine offered by some NAS vendors. You can test service configuration and get a feel for the interface and tools, but obviously as a virtual environment you won’t be able to manage hardware directly. Here are some options: The on-board NAS OS looks similar to a Mac or PC operating system to make it easy to navigate system setup and maintenance and allows you to manage settings, storage, and tasks. 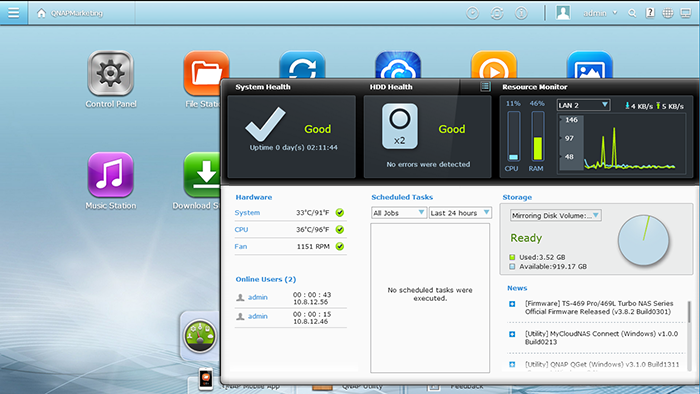 Solutions: What Added Services Do You Require? While the onboard processor and memory on your NAS are primarily for file service, backup, and sync tasks, you can also install other solutions directly onto it. For instance, QNAP and Synology—two popular NAS providers—have app stores accessible from their management software where you can select applications to download and install on your NAS. You might be interested in a backup and sync solution. However, beyond backup solutions, you’d benefit from installing mission-critical apps onto a dedicated system rather than on your NAS. For a small number of users, running applications directly on the NAS can be a good temporary use or a pathway to testing something out. But if the application becomes very busy, it could impact the other services of the NAS. Big picture, native apps on your NAS can be useful, but don’t overdo it. The main backup and sync apps from the major NAS vendors are excellent—give them a good test drive, but know that there are many excellent backup and sync solutions available as well. 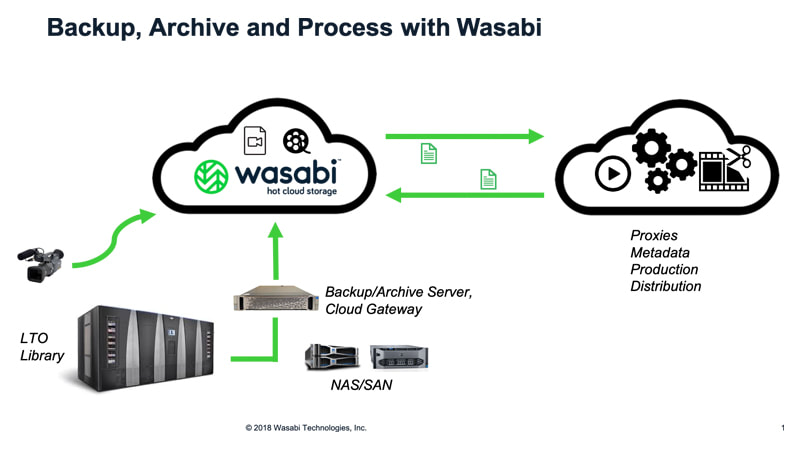 Why Adding Cloud Storage to Your NAS Offers Additional Benefits When you pair cloud storage with your NAS, you gain access to features that complement the security of your data and your ability to share files both locally and remotely. To start with, cloud storage provides off-site backup protection. This aligns your NAS setup with the industry standard for data protection: a 3-2-1 backup strategy—which ensures that you have three copies of your data, the source data and two backups—one of which is on your NAS, and the second copy of your data is protected off-site. And in the event of data loss, you can restore your systems directly from the cloud even if all the systems in your office are knocked out or destroyed. While data sent to the cloud is encrypted in-flight via SSL, you can also encrypt your backups so that they are only openable with your team’s encryption key. The cloud can also give you advanced storage options for your backup files like Write Once, Read Many (WORM) or immutability—making your data unchangeable for a defined period of time—or set custom data lifecycle rules at the bucket level to help match your ideal backup workflow. Additionally, cloud storage provides valuable access to your data and documents from your NAS through sync capabilities. In case anyone on your team needs to access a file when they are away from the office, or as is more common now, in case your entire team is working from home, they’ll be able to access the files that have been synced to the cloud through your NAS’s secure sync program. You can even sync across multiple locations using the cloud as a two-way sync to quickly replicate data across locations. For employees collaborating across great distances, this helps to ensure they’re not waiting on the internet to deliver critical files: They’re already on-site. Ready to Set Up Your NAS With Cloud Storage
To summarize, here are a few things to remember when shopping for a NAS system:
0 Comments
 Facebook allows search engines like Google to index your profile and publicly available information. But if you don’t want people to be able to look up your social profile outside of Facebook, you can choose to delist it. Here’s how. First, head over to Facebook’s website using your Windows 10, Mac, or Linux desktop browser and sign in to your account. Next, click the arrow in the top-right corner of the social network to reveal a dropdown menu, then select “Settings & Privacy.” 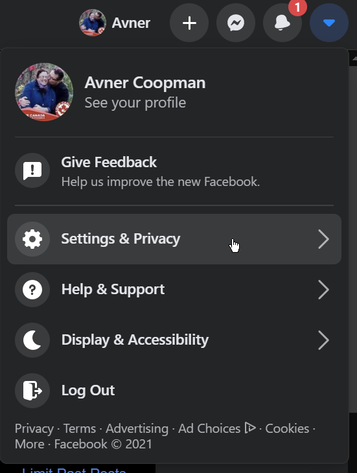 Navigate to “Settings.” 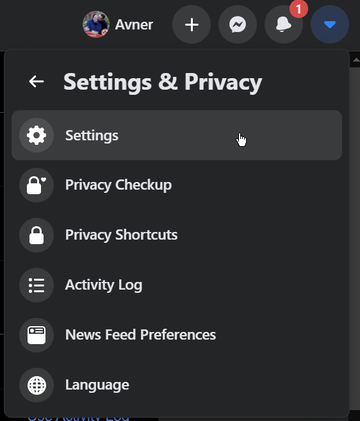 Select “Privacy” from the column on the left. Scroll down toward the bottom of the page, and under the “How people can find and contact you” section, you’ll find an option called “Do you want search engines outside of Facebook to link to your Profile?”  Click the blue “Edit” button located beside that option. Uncheck the box next to “Allow search engines outside of Facebook to link to your Profile.” 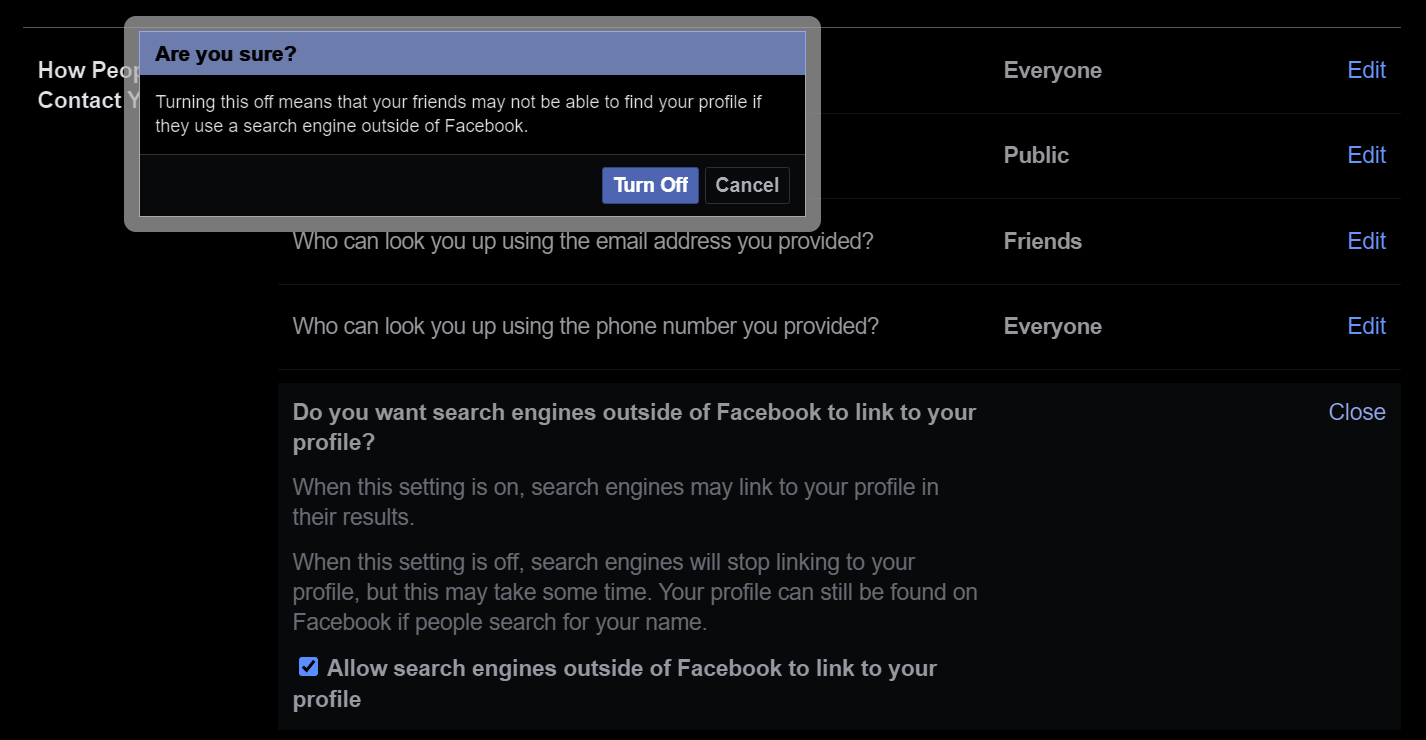 Finally, select the “Close” option to save your new preference. That’s it. Now, Facebook will prevent search engines outside of the social network from linking your profile in their results.
Note: This setting will take at least a few weeks to come into effect. Even after Facebook processes the request on its end, your information and profile link will continue to exist in search engines’ cache and will surface in search results. Once Facebook relays the updated preference to sites such as Google, Yahoo, and Bing, they will take some additional time to reflect the changes. In addition, while search engines will no longer be able to directly link your profile in results, they can crawl your publicly available information, like posts and your full name. Due to this loophole, anyone with the right keywords can still locate your Facebook profile through search engines.  Don't lose your files. Here's how to regularly back up or restore your Mac using Apple's handy, built-in Time Machine tool. t’s a good idea to periodically back up your computer. You want to make sure your documents, photos, and files are protected in case of hardware failure, software glitch, or malware attack. Apple makes this process easy for Mac users with the built-in Time Machine tool that lets you back up your entire system and then restore individual files or the entire drive. You can trigger manual backups or set them to run automatically. Backups can be stored on an external drive, another Mac, network storage, or an AirPort Time Capsule. Time Machine has not changed in years, so the process is the same no matter which version of macOS you’re running. The initial steps differ based on your backup media, so we’ll cover each type separately. External Drive 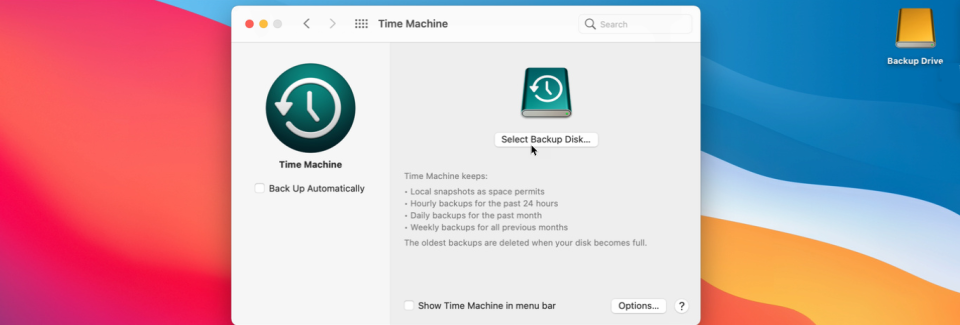 In the case of an external drive, plug it into your Mac and make sure its icon appears on the desktop. Open System Preferences and go to Time Machine > Select Backup Disk, then select the drive and click Use Disk. 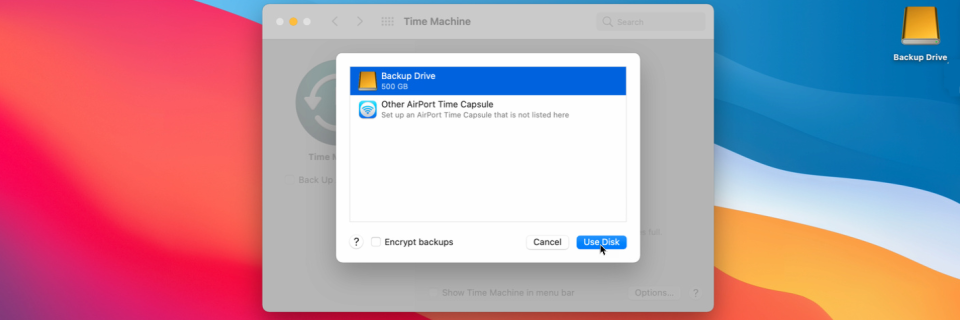 If the disk isn't formatted to support the Mac and Time Machine, you’re asked to erase the disk first. The drive is then prepared for backup. Another Mac 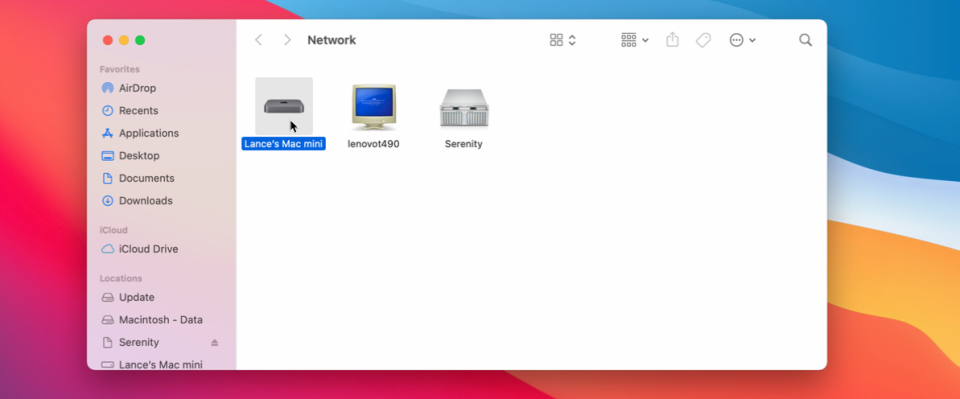 To use another Mac as your backup destination, you’ll need to create a shared folder on it to serve as the backup location. Apple can walk you through the steps. You then connect the two computers by opening Finder on the Mac you wish to back up and double-clicking the destination Mac listed under Network. 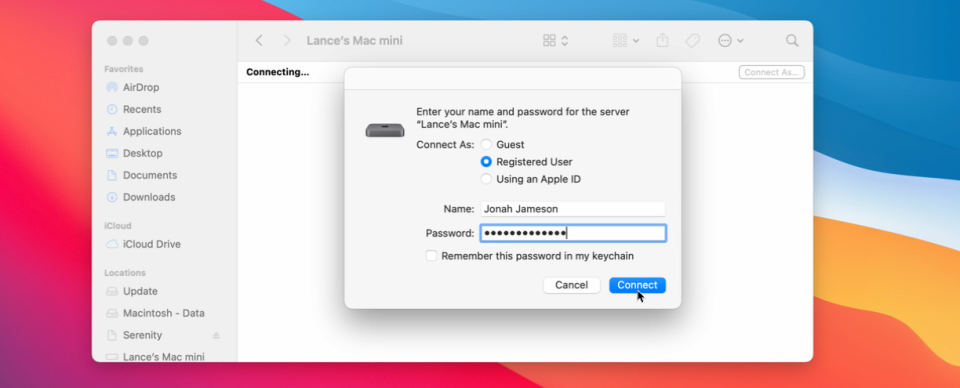 Enter the username and password for the destination Mac and click Connect. You should then see the shared folders on that Mac, including the backup folder you set up. 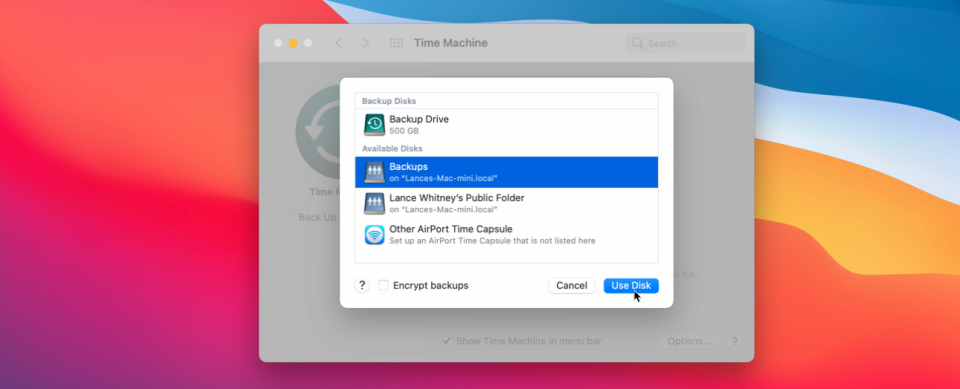 Open the Time Machine preferences on the Mac you want to back up. Click Select Disk, then choose the backup share on the destination Mac and click Use Disk. You’re then asked by Time Machine to enter the username and password for your destination Mac. Network Storage 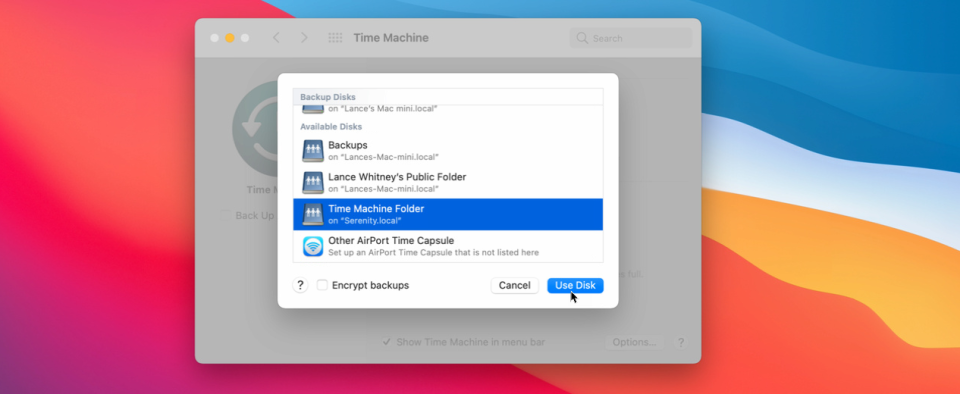 Backing up to a network attached storage device (NAS) can be tricky because Time Machine works only with certain volume types. If you own a Synology NAS, Synology supports Time Machine and provides a support page on how to use your NAS for backups. For other types of NAS drives and network storage, you may have to contact the vendor to find out if and how it can be used for Time Machine backups. If you’re able to use your network storage, open the Time Machine preferences on the Mac you want to back up. Click Select Disk and choose the backup share on your NAS or other network device. You’re then asked by Time Machine to enter the username and password for your network share. Backup Setup 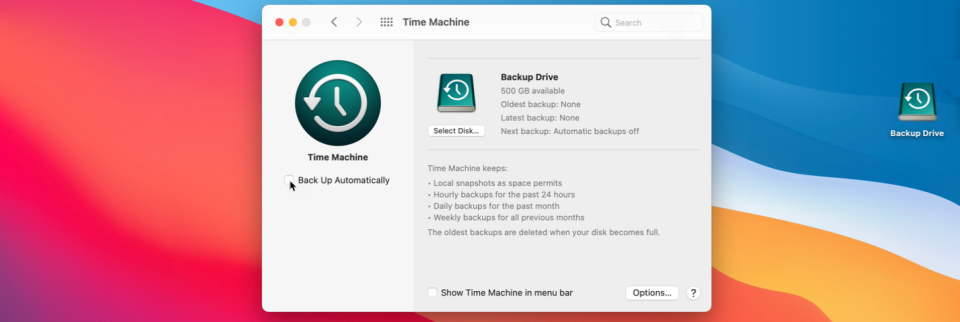 By default, the backups are set to run automatically. Time Machine keeps local backups based on available disk space, hourly backups for 24 hours, daily backups for a month, and weekly backups for all the past months. The oldest backups start to get deleted as you run out of space on your backup media. If you don’t want the backups to run automatically, uncheck the option for Back Up Automatically. You can also check the box next to Show Time Machine in menu bar for quicker access. 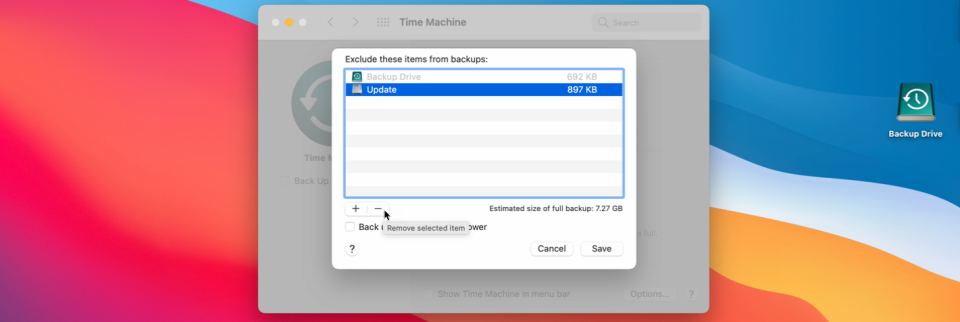 To view and control more settings, click the Options button. Here, you can choose any partitions that you don’t want to include in the backup and decide whether or not your Mac should be backed up when on battery power. Manual Backup 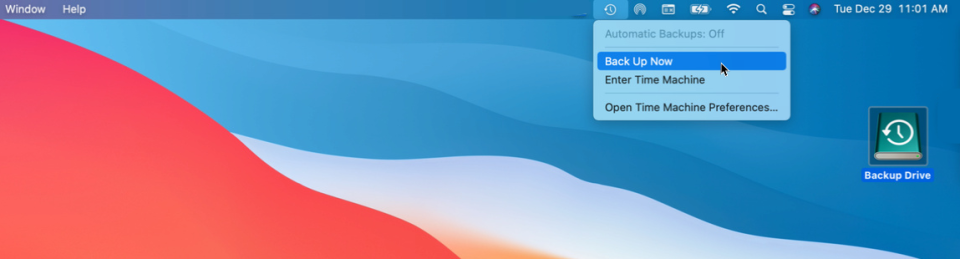 To perform a manual backup, click the Time Machine’s menu bar icon and select Back Up Now, or hold Ctrl and the icon for your backup drive and select Back Up Now. Your system is then backed up in the background. 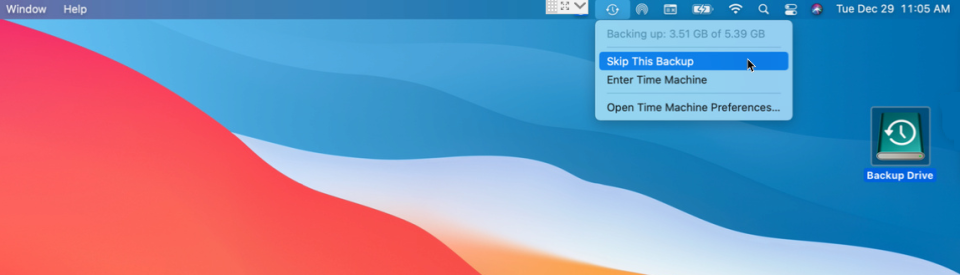 Now if you click the Time Machine icon in the menu bar, you can see the progress of the backup. Keep in mind that a backup run over a network will take much longer than a backup to a connected drive. You can stop the backup by selecting Skip This Backup. A notification will appear on the screen when the backup is completed. Restore Individual Files 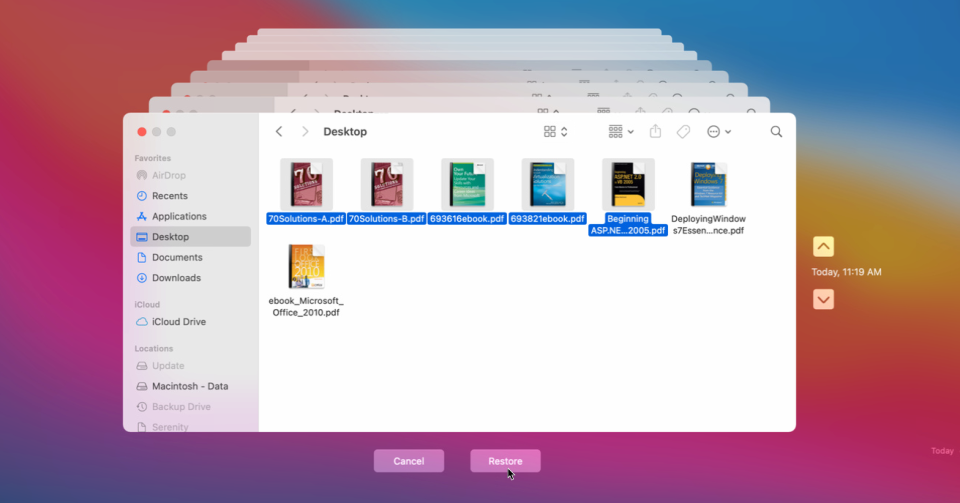 To restore an individual file or multiple files from a backup, click the Time Machine icon in the menu bar and select Enter Time Machine. Several cascading windows pop up, with each window pointing to a different backup. Notice the two arrows to the right of the windows with a label that says Today (Now). This indicates the folder is the most recent version. Click the up arrow to go back in time to find a previous backup that has the files you need. Once you find the correct backup, select the folder with the files you wish to restore, then click the Restore button. The files are then restored to their original location. Restore Your Entire System 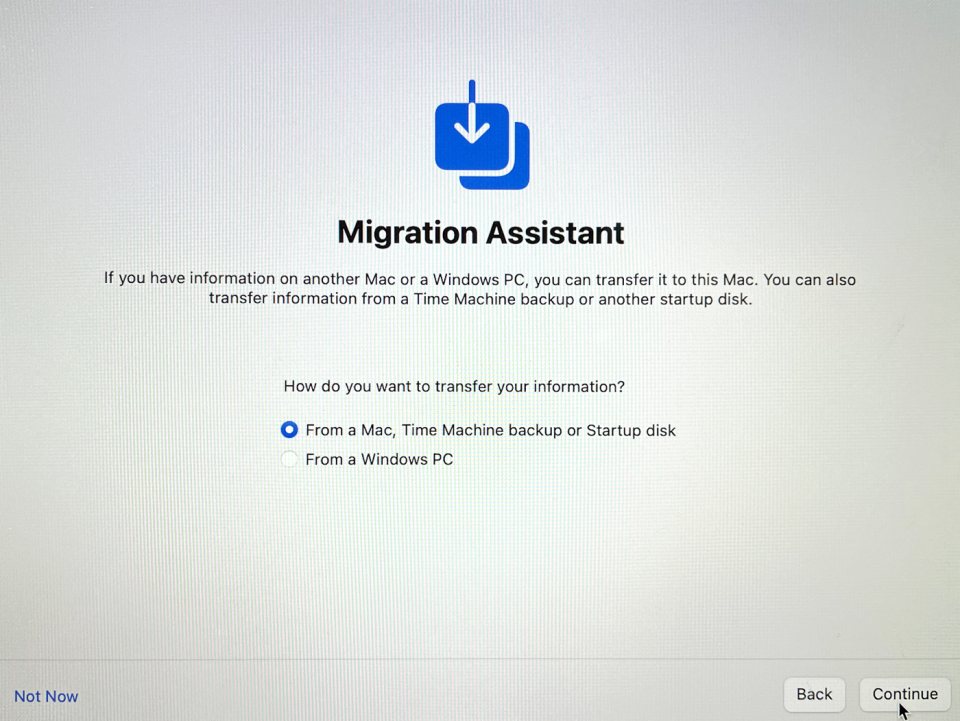 To restore your entire system from a backup, connect your Time Machine backup disk to your Mac. If the backup is on a network share, make sure your Mac is on the same network. You’ll then need to reinstall macOS as part of the factory reset process. Once the operating system is reinstalled, you can then transfer your existing data using the Migration Assistant. Choose From a Mac, Time Machine backup, or Startup disk from and click Continue. 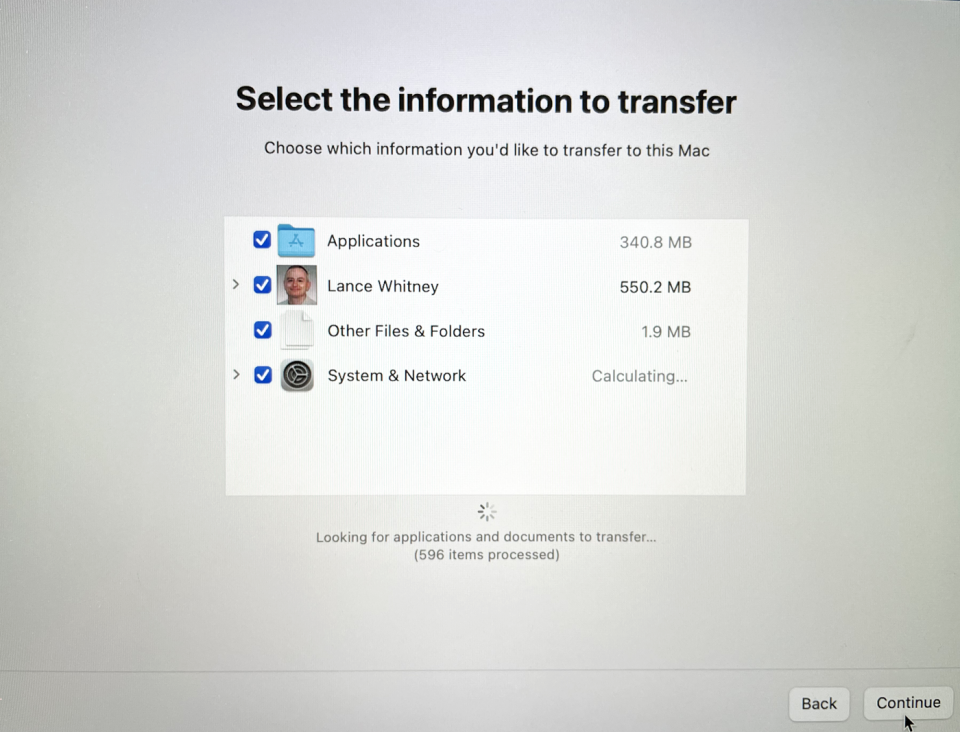 You then select your Time Machine backup media and click Continue. Confirm the information to transfer, deselecting any content you don’t want restored, then click Continue. Create a password for your account and click Continue. 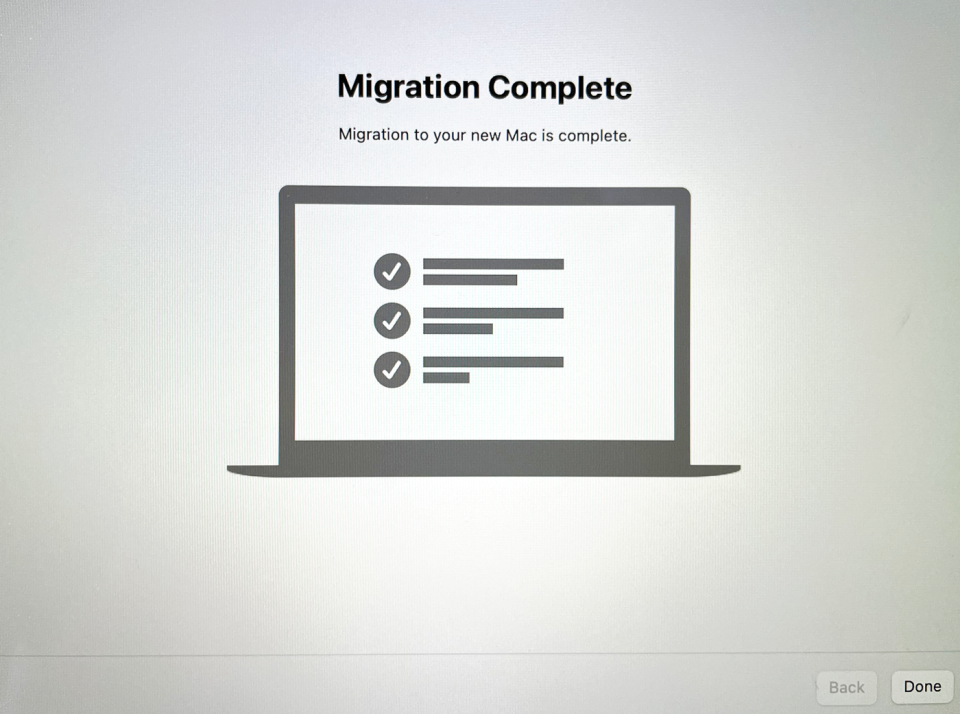 The information from your backup is then transferred and restored. You will see that the migration is complete. Click Done, sign back into your Mac, and finish the setup. Thanks: Lance Whitney - PCmag
Does your Chrome browser feel like it's running a bit slower than usual? These tips and tricks can help you give Google Chrome a speed boost  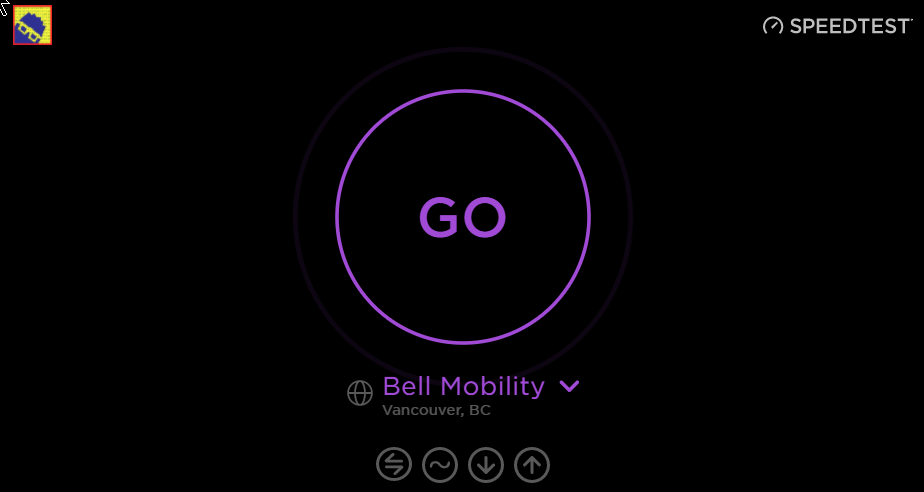
Check Your Internet Speed Before you blame Chrome for your slowdowns, make sure your internet connection is up to snuff. Run a speed test like to see how your connection measures up. It's possible you're just experiencing a slowdown in your area, or you're on a crappy public network. (Or maybe you just need to pay for faster internet.) 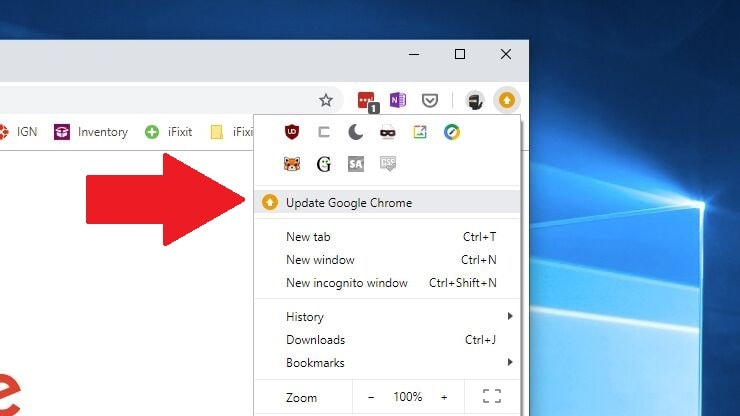
Update to the Latest Version of Chrome Each new version of Chrome contains new features, security fixes, and—often—performance improvements, so it's possible updating to the latest version may help your speed woes. Even if it doesn't, it'll keep you safer from online threats. Chrome updates itself automatically, so chances are you're already on the latest version, provided you've closed the browser recently. If you're behind, Chrome will display a yellow or red arrow in the upper right-hand corner of the browser. This means an update is waiting for you, so all you have to do is close out the browser window or click the arrow and choose Update Google Chrome to restart and get the update. It probably won't make any night-and-day speed differences, but it's a good place to start nonetheless. 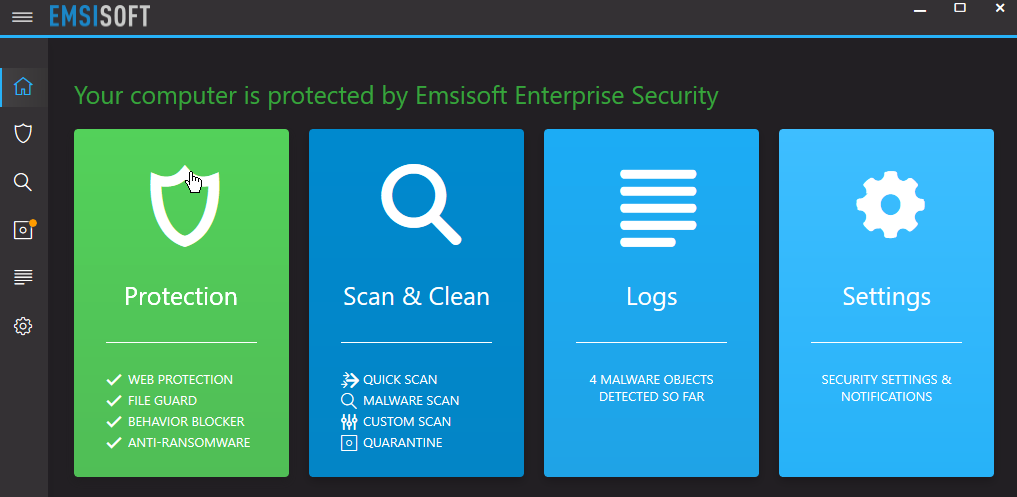
Run a Malware Scan Before you go digging into Chrome's settings, you might want to ensure you don't have any malware on your system. Run a scan with your anti-malware tool of choice and make sure there aren't any nefarious actors running in the background. These can shove extra advertisements into the pages you visit or track your behavior, which require resources—and thus can slow down your browser and computer. 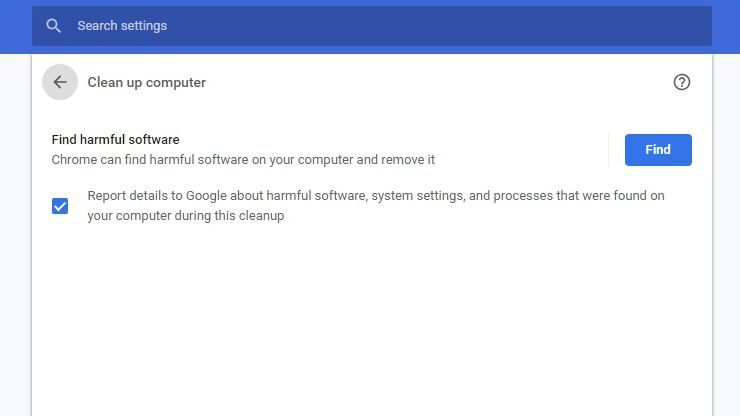
Run the Chrome Cleanup Tool Google developed a program called the Chrome Cleanup Tool, which would detect potentially unwanted programs (PUPs), like toolbars and other automatically installed extensions that your antivirus may not be designed to catch. Google has since integrated this directly into Chrome, and you can run it by going to Settings > Advanced > Reset and clean up > Clean up computer. Run the tool and it'll check your computer for any software that might be slowing down your browser. 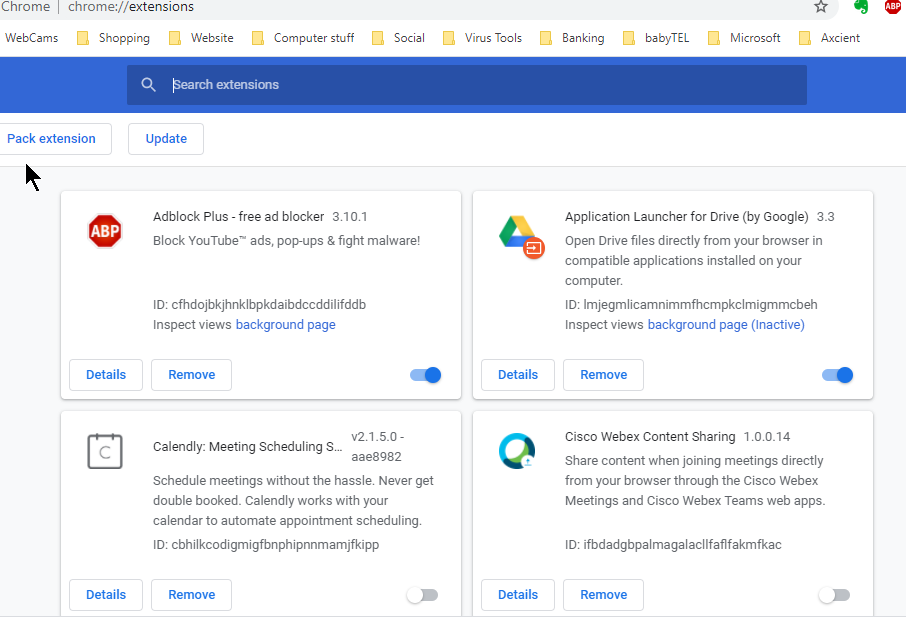
Uninstall Extensions You Don't Need One of the best things you can do to speed up Chrome is slim it down. Extensions and tabs are the biggest resource hogs, and the fewer you have, the snappier Chrome will feel. Let’s start with extensions: you can see which ones are taking up the most CPU and RAM by pressing Shift + Esc on your keyboard, which will bring up Chrome's Task Manager. Check out which ones are hogging the most resources, and which ones aren't crucial to your workflow. Uninstall extensions by right-clicking on their icon in the toolbar and selecting Remove from Chrome. Or go to chrome://extensions and remove them from there. The more you get rid of, the more of a speed boost you'll get (not to mention a security boost, since extensions can be hacked or sold to adware companies). 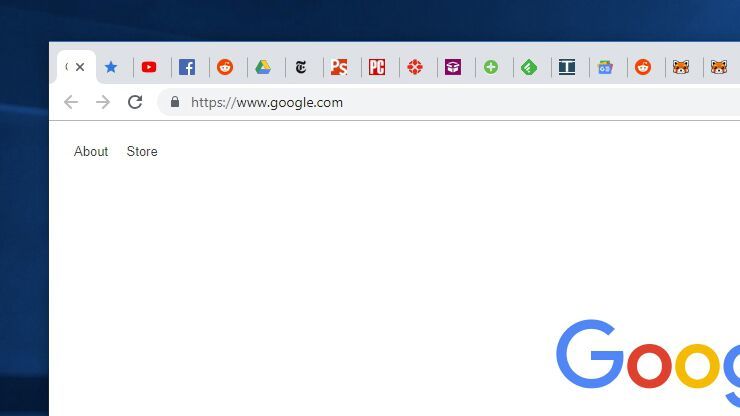
Close (or Unload) Tabs You Aren't Using If you're the kind of person who opens 19 tabs and leaves them running for later, it's a good bet your slowdown is coming from having so many sites open in the background. Chrome can discard tabs if it runs out of memory, but in my experience, it isn't very aggressive about it. Close any tabs you don't need (once again, Shift + Esc is your friend), and bookmark them for later. You can also grab an extension like Auto Tab Discard, which allows you to automate the "unloading" of certain tabs based on different criteria and keep them in your tab bar, which you can then reload as you need them. Yes, I realize the irony of installing an extension when we just told you to uninstall as many as possible, but depending on how many tabs you tend to keep open, the result may still be a net positive speed increase for this particular case. 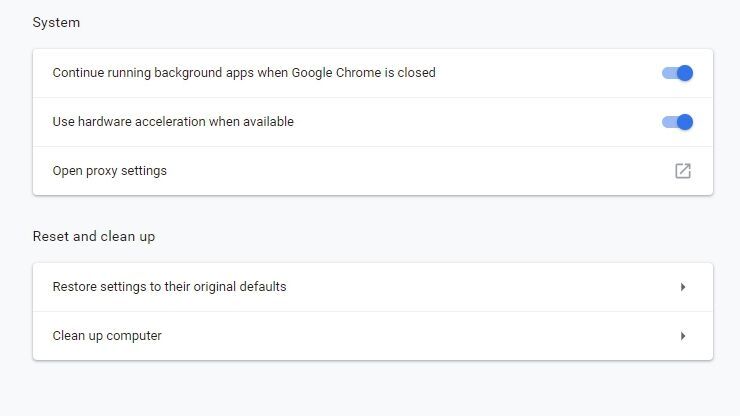
Wipe the Slate Clean If you still can't get Chrome to cooperate, it may be time to go nuclear and reset the browser to its original defaults—no extensions, custom search engines, or other saved settings. This can be a pain, but if you discover Chrome goes back to being zippy after resetting, you might be able to keep it tidier and prevent it from building up extra cruft (or at least determine which extension or settings caused things to slow down later). To perform a reset, head to Settings > Advanced > Reset and clean up > Restore settings to their original defaults > Reset settings. Of course, it may not be Chrome's fault at all—your computer may just be getting a little long in the tooth. |
|
2951 Britannia crescent
Port Coquitlam BC, V3B 4V5 778-776-6222 Hours of operation Mon - Fri 9 a.m. - 6 p.m. Sat 11 a.m. - 5 p.m. (by appointment only) Sunday & Holidays - Closed |
Business Number 778569517BC0001 - © Copyright CompuBC, All Rights Reserved.
|